Activity Feed
An activity feed can be thought of as a bulletin board and an activity log for the Table Item.
The activity feed allows you to view a timeline of previous events of the individual item including any changes that have been made or notes that have been attached.
The activity feed comes default with every item that is created. The below image displays a typical Activity Feed page.

Viewing The Activity Feed
It is important to note that the Activity Feed component displays information related to an [item of an entity.](/docs/Rapid/2-User Manual/glossary/glossary.md#table-items-and-columns)
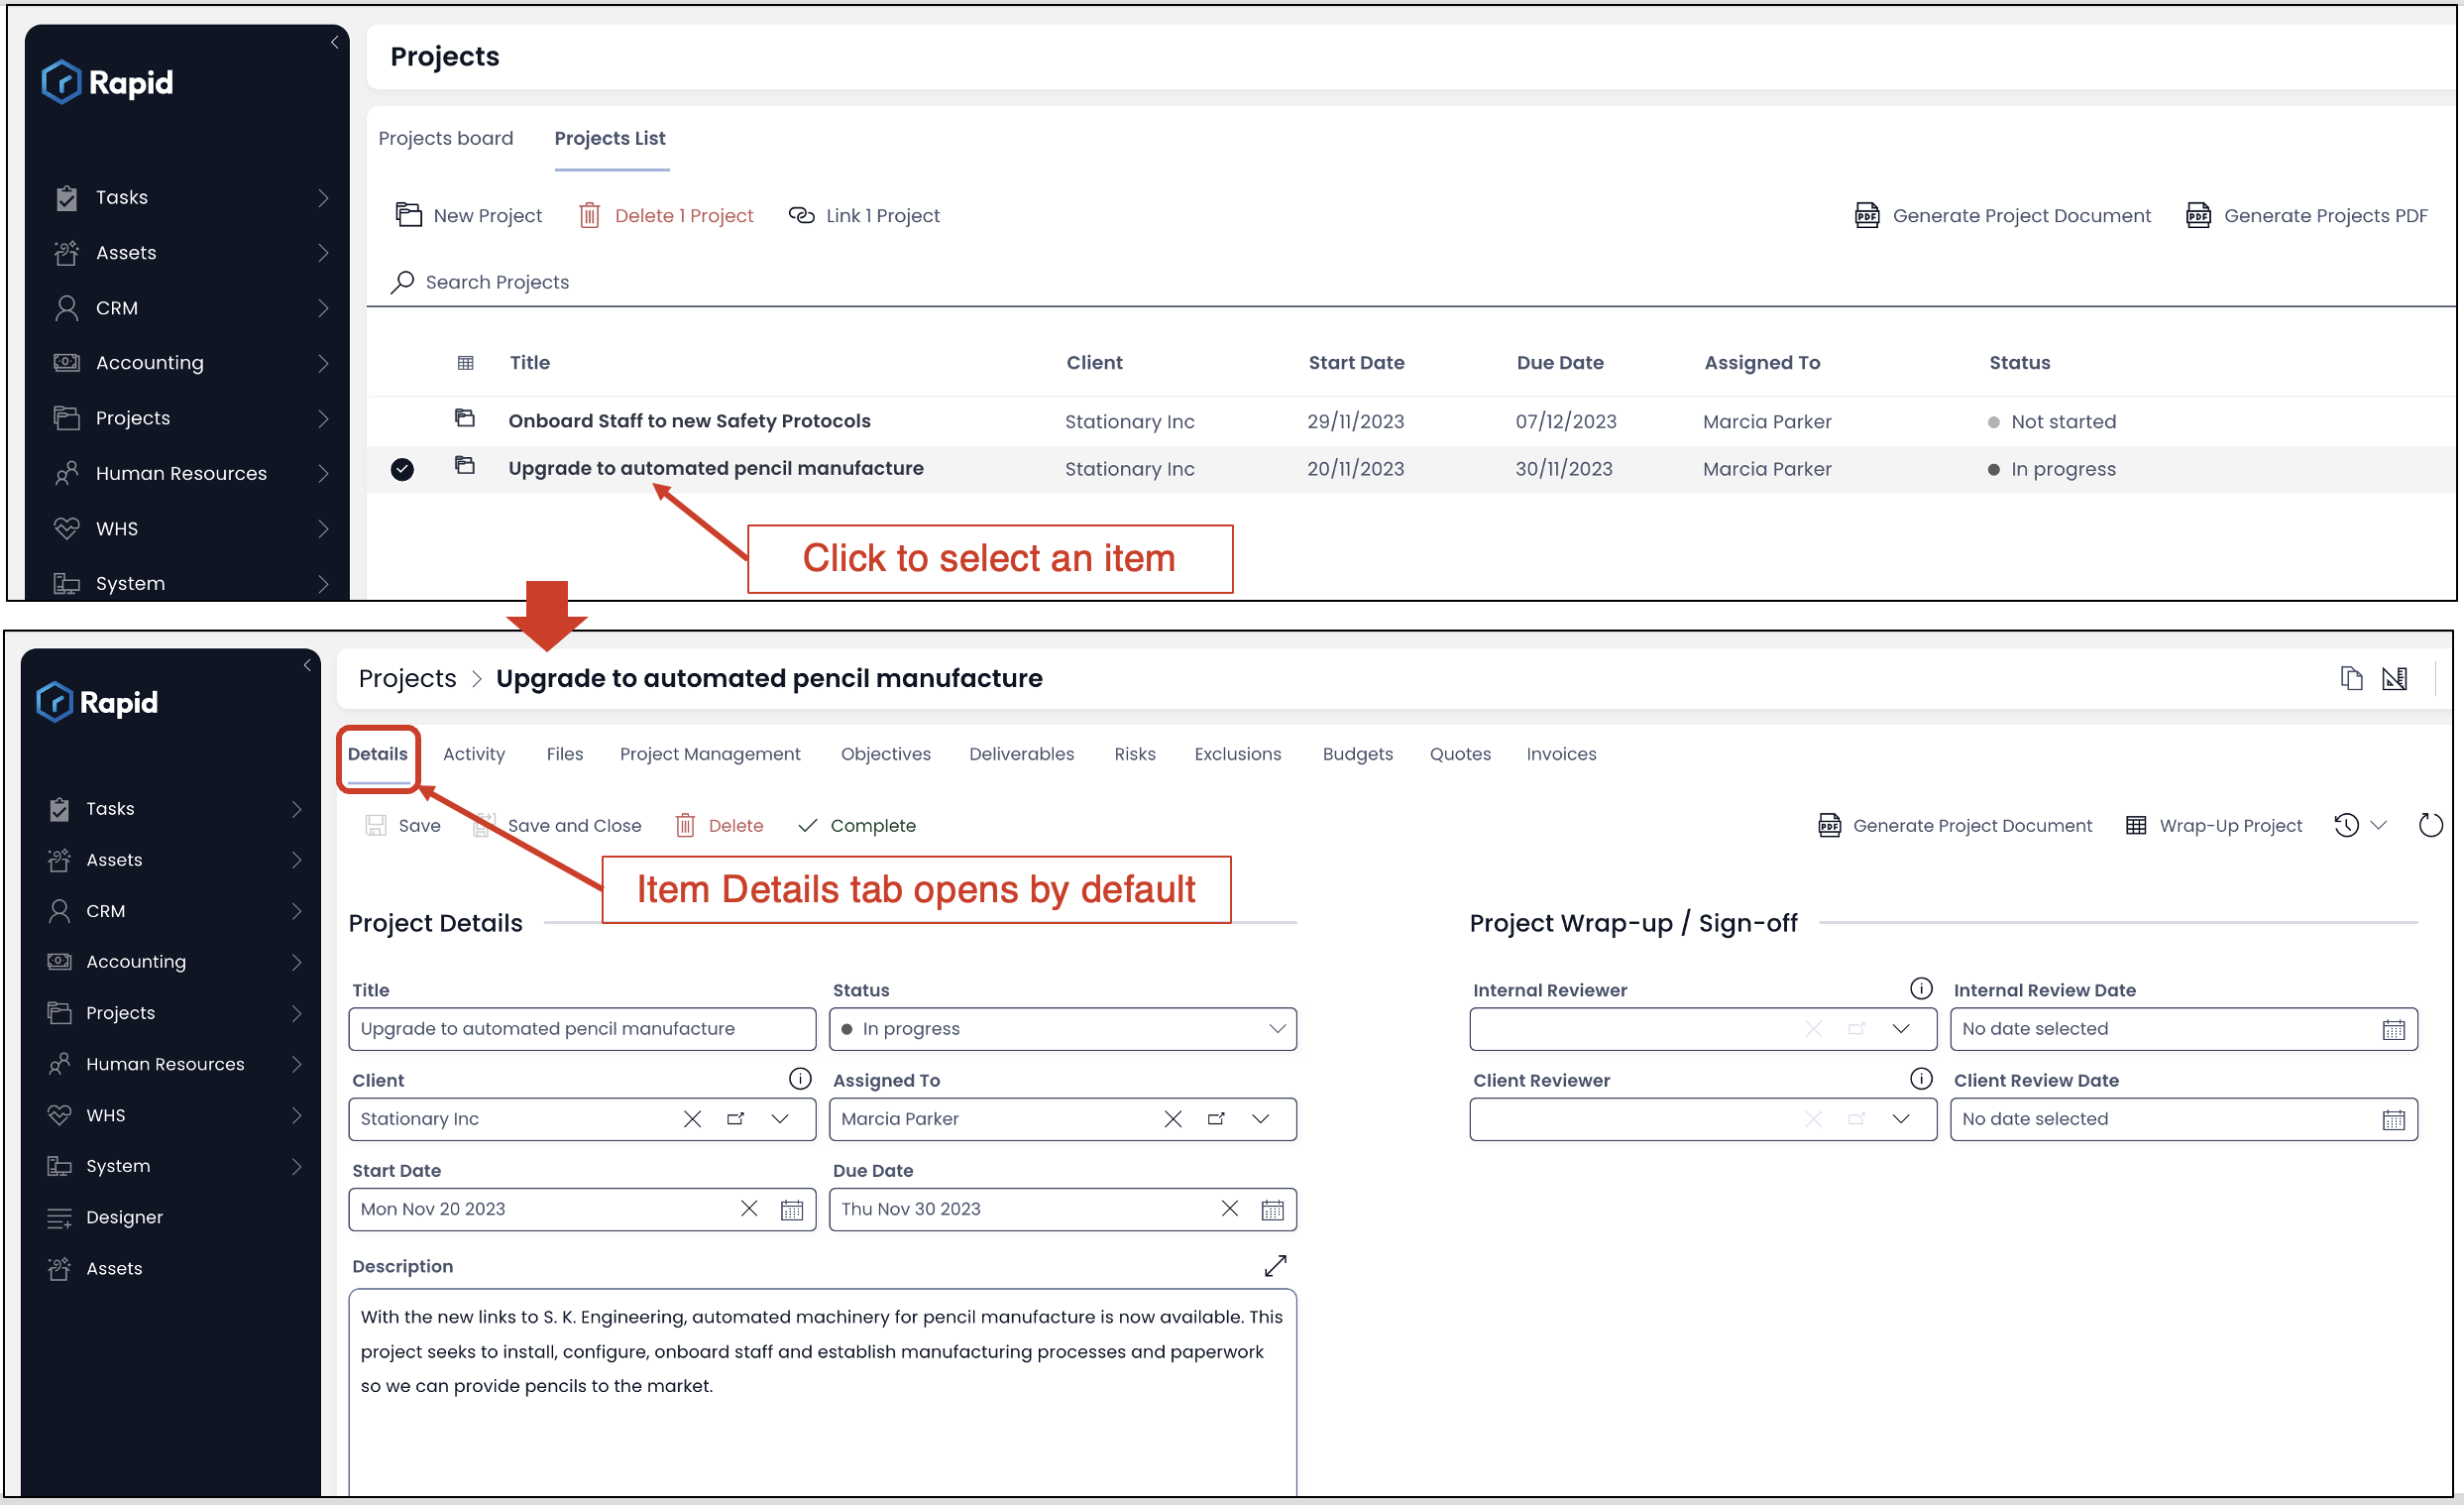
To view the default activity feed from Explorer, it is assumed that an item is present within the entity for which you want to view the Activity Feed. To view the activity feed from the default tab that is provided with every item:
-
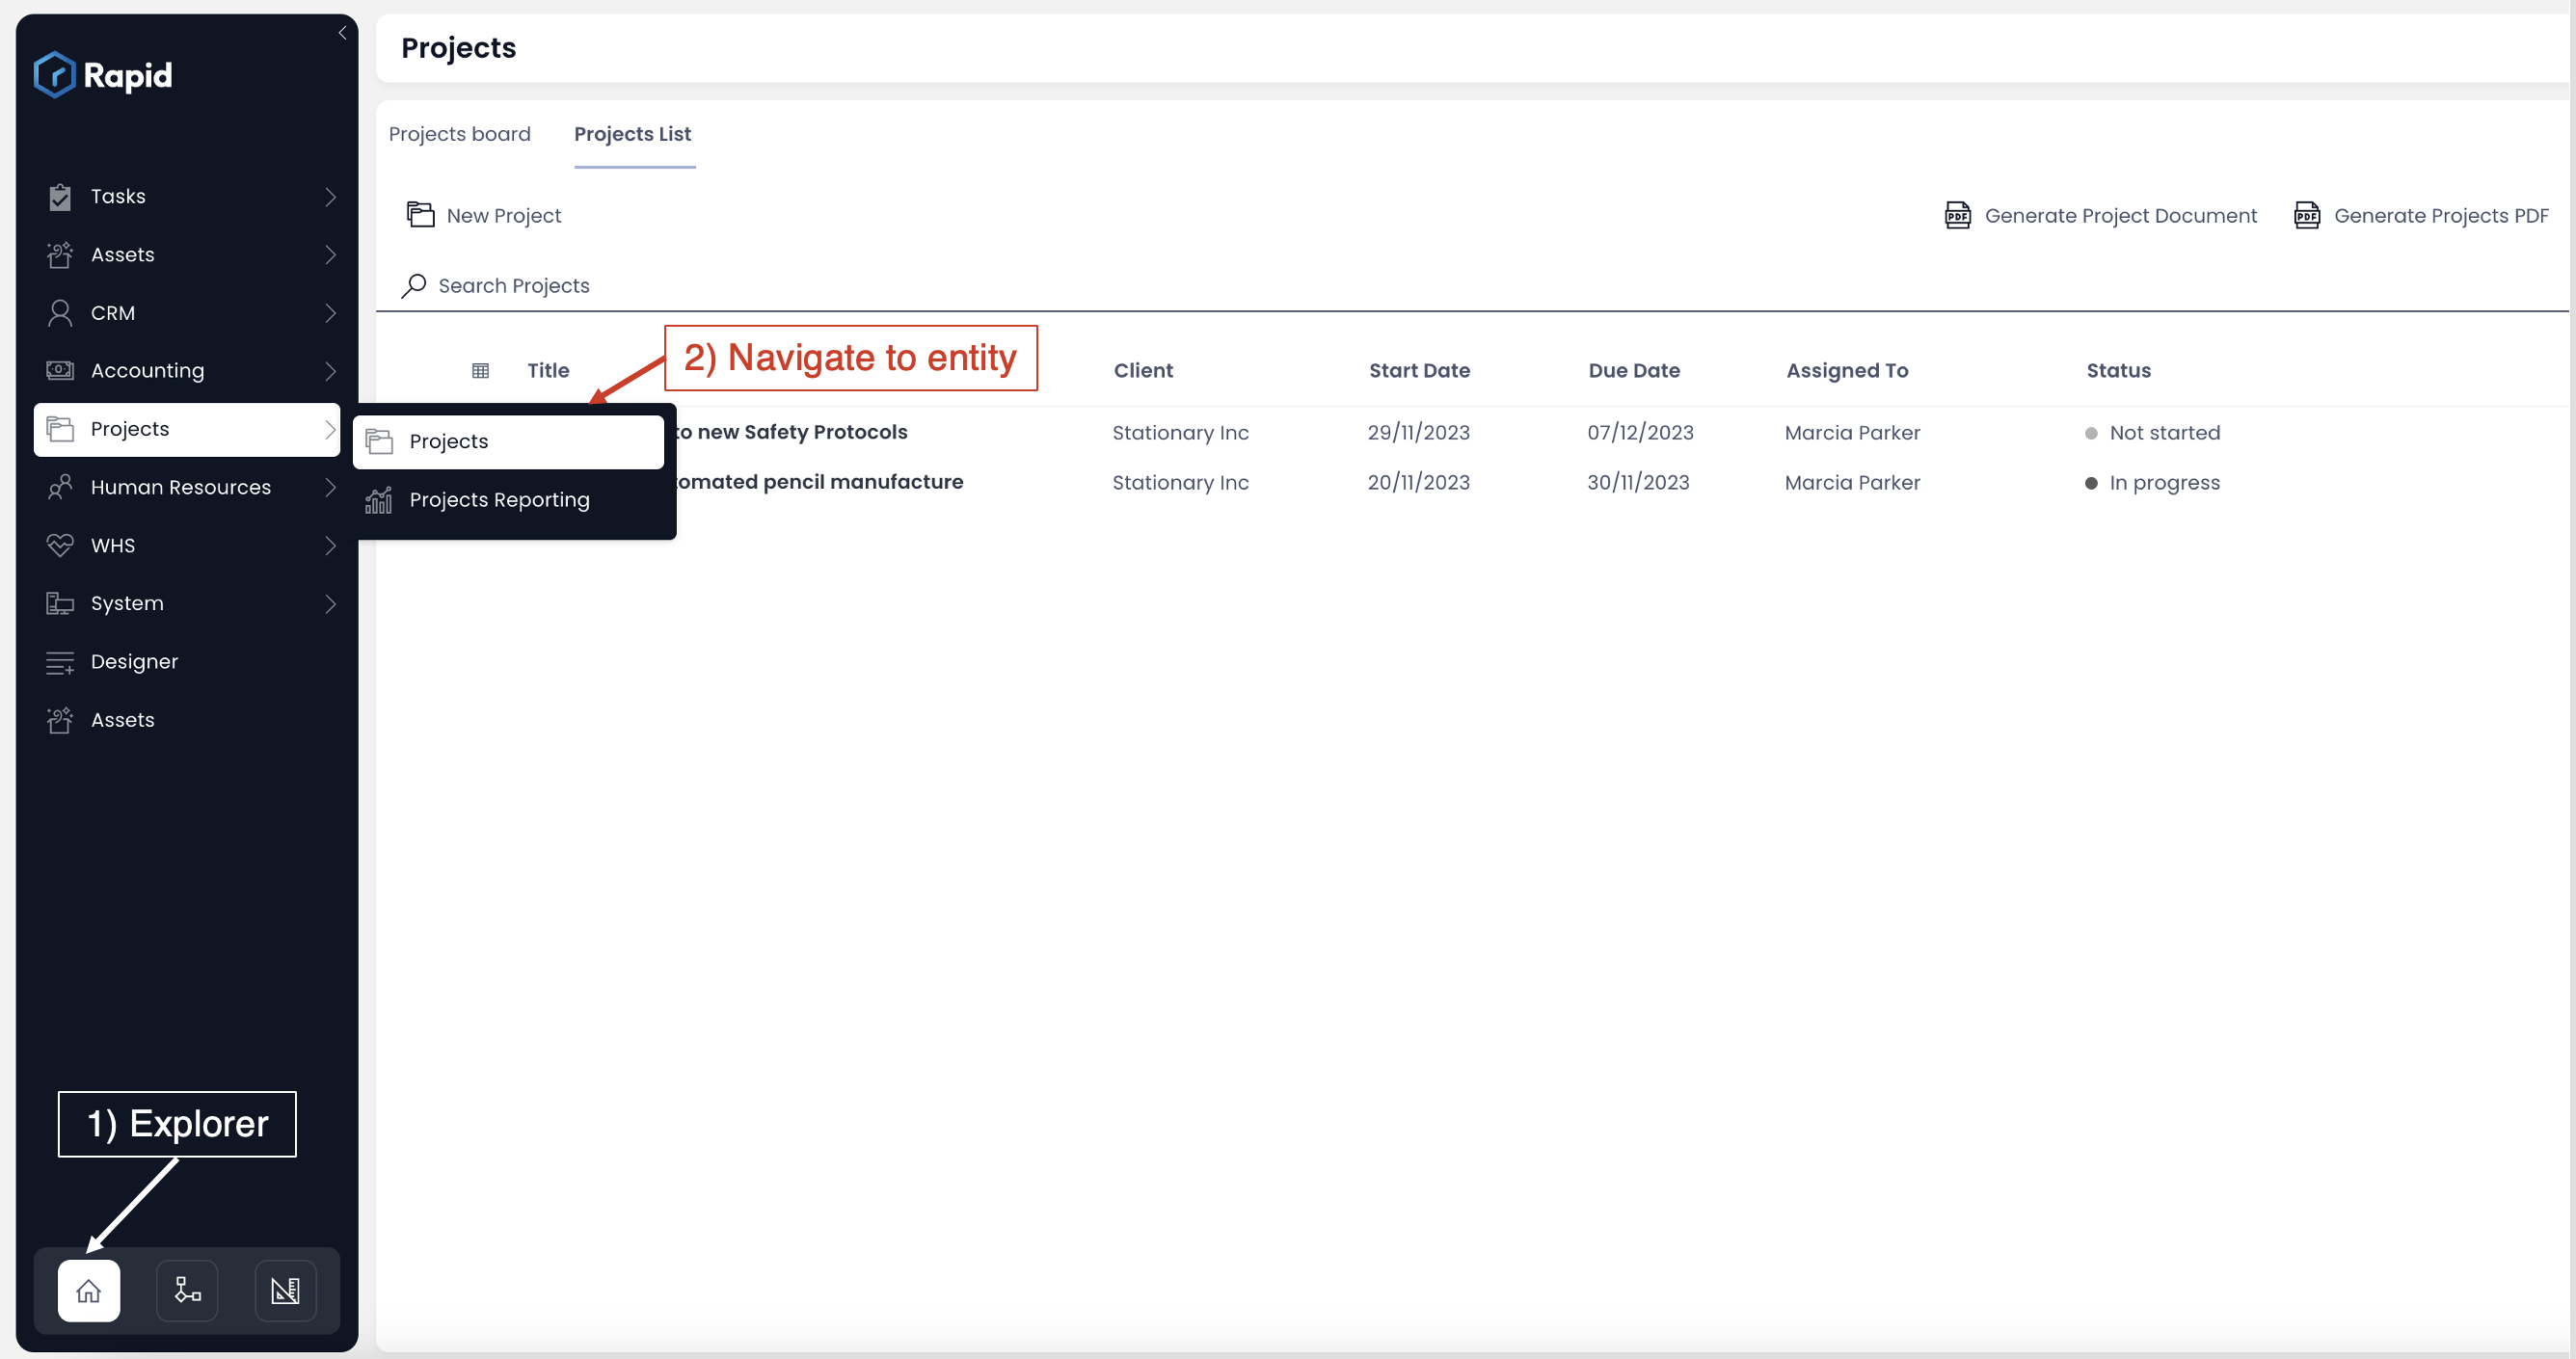
In the navigation menu, select Explorer experience, and navigate to the entity of choice.
-
Click on an item in the entity to select the same. By default this will open the Item Details page.
-
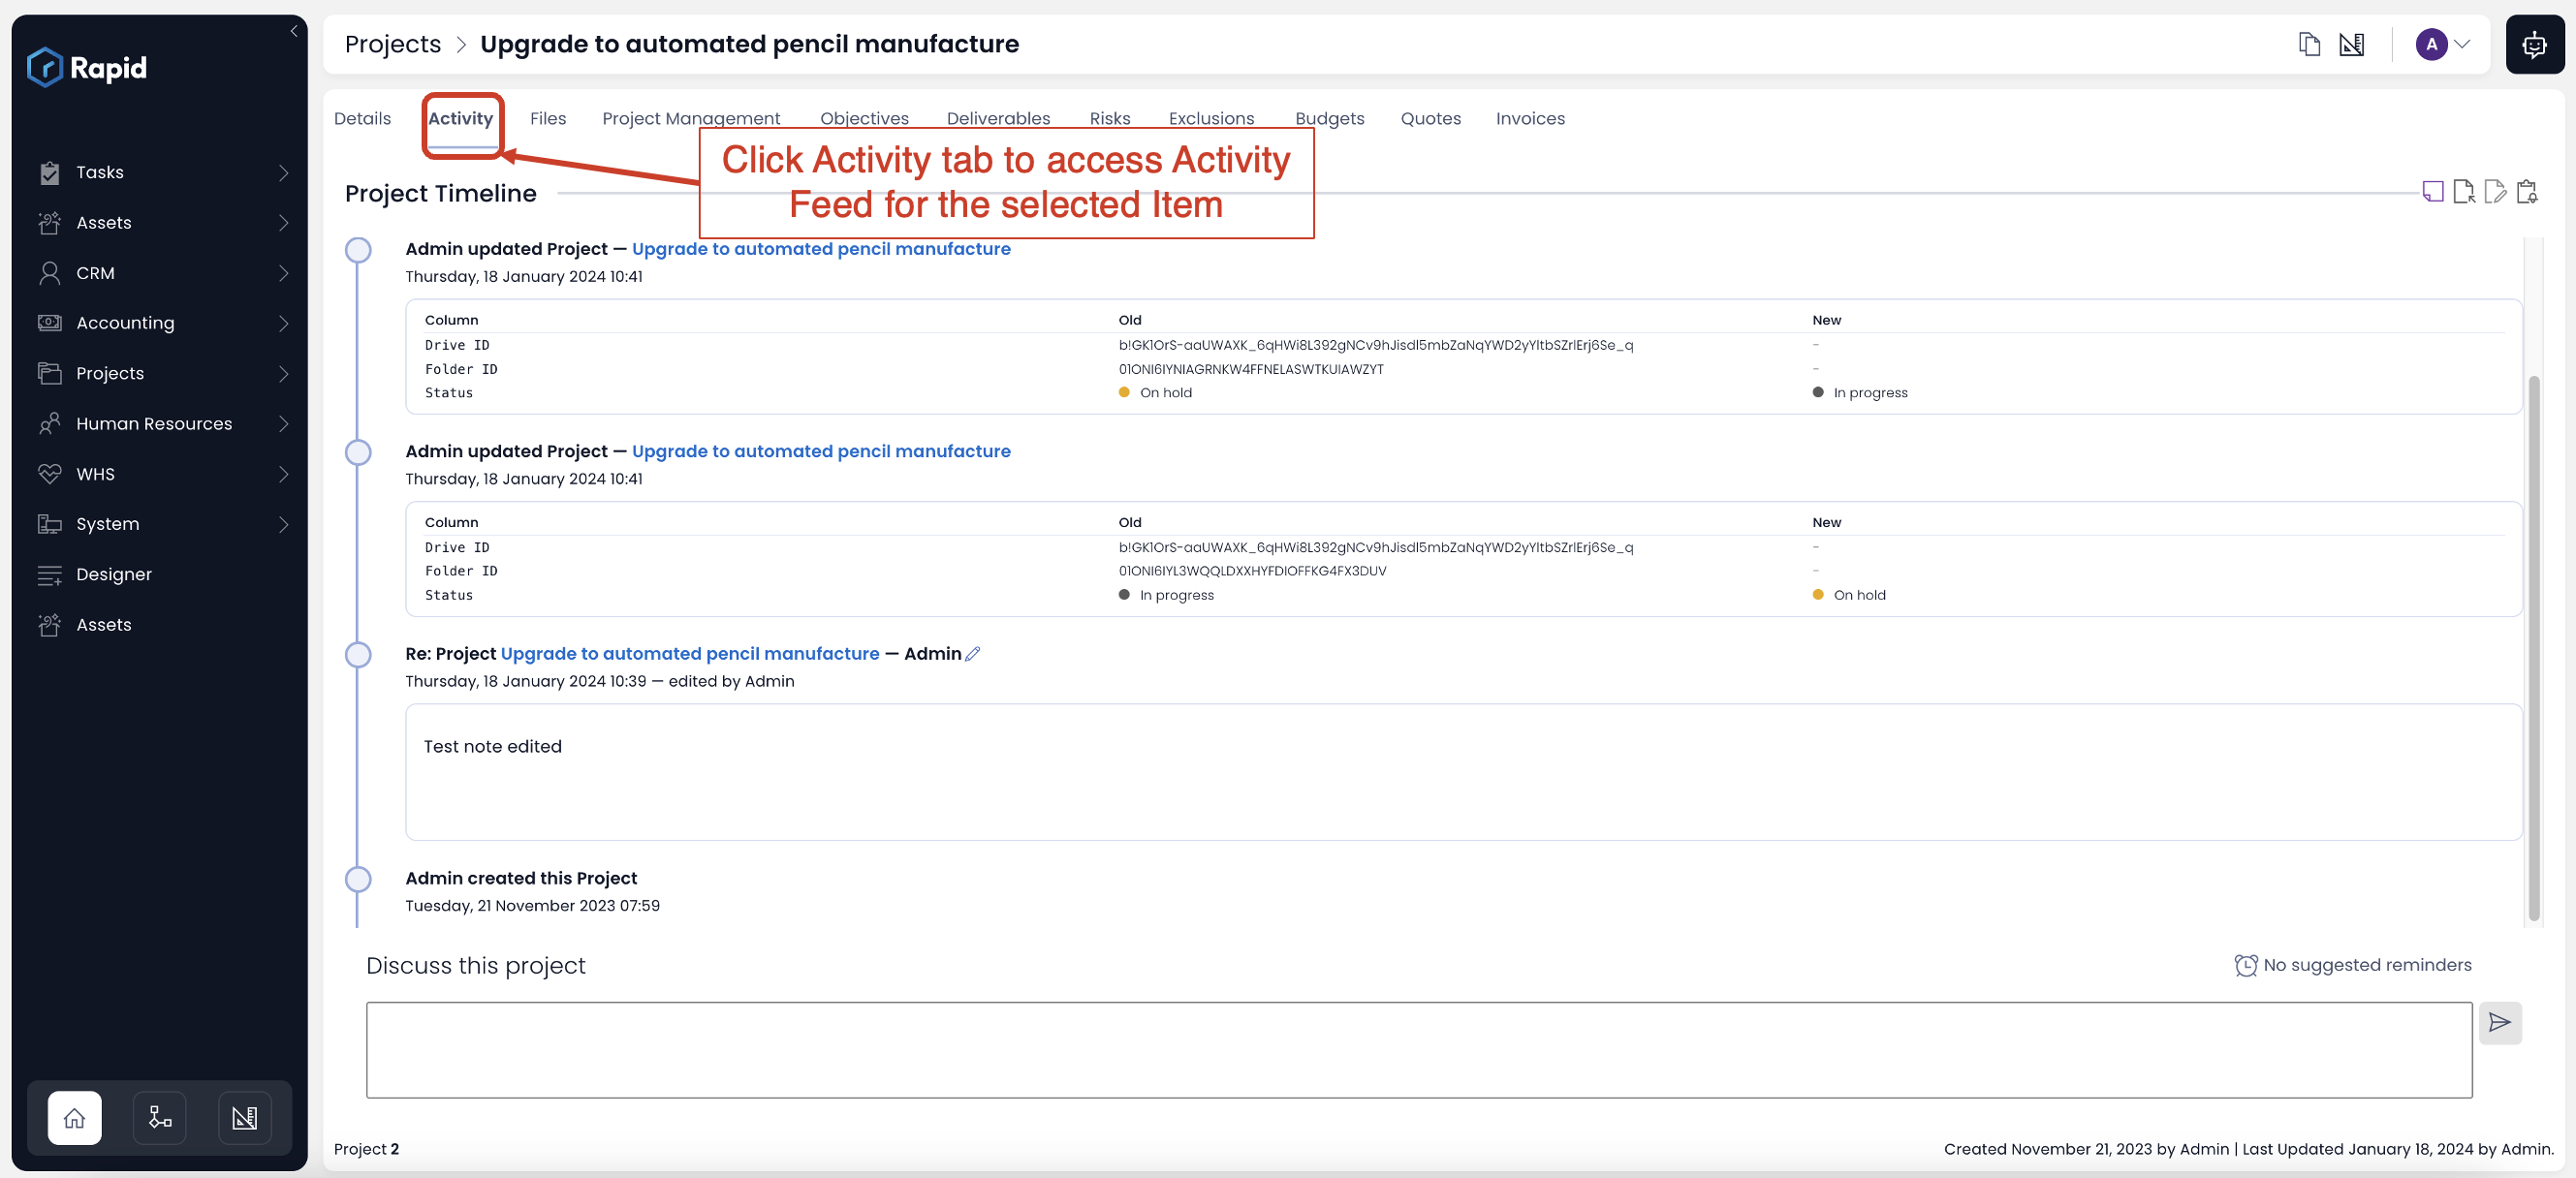
In the list of tabs, click Activity. The Activity Feed should now appear on your screen displaying the information for the selected item.
The above are the steps to access Activity Feed present in the default position for every table item. However, the system administrator might have configured the Item Details in a way to include Activity Feed Component in some other desired location.
Observe that:
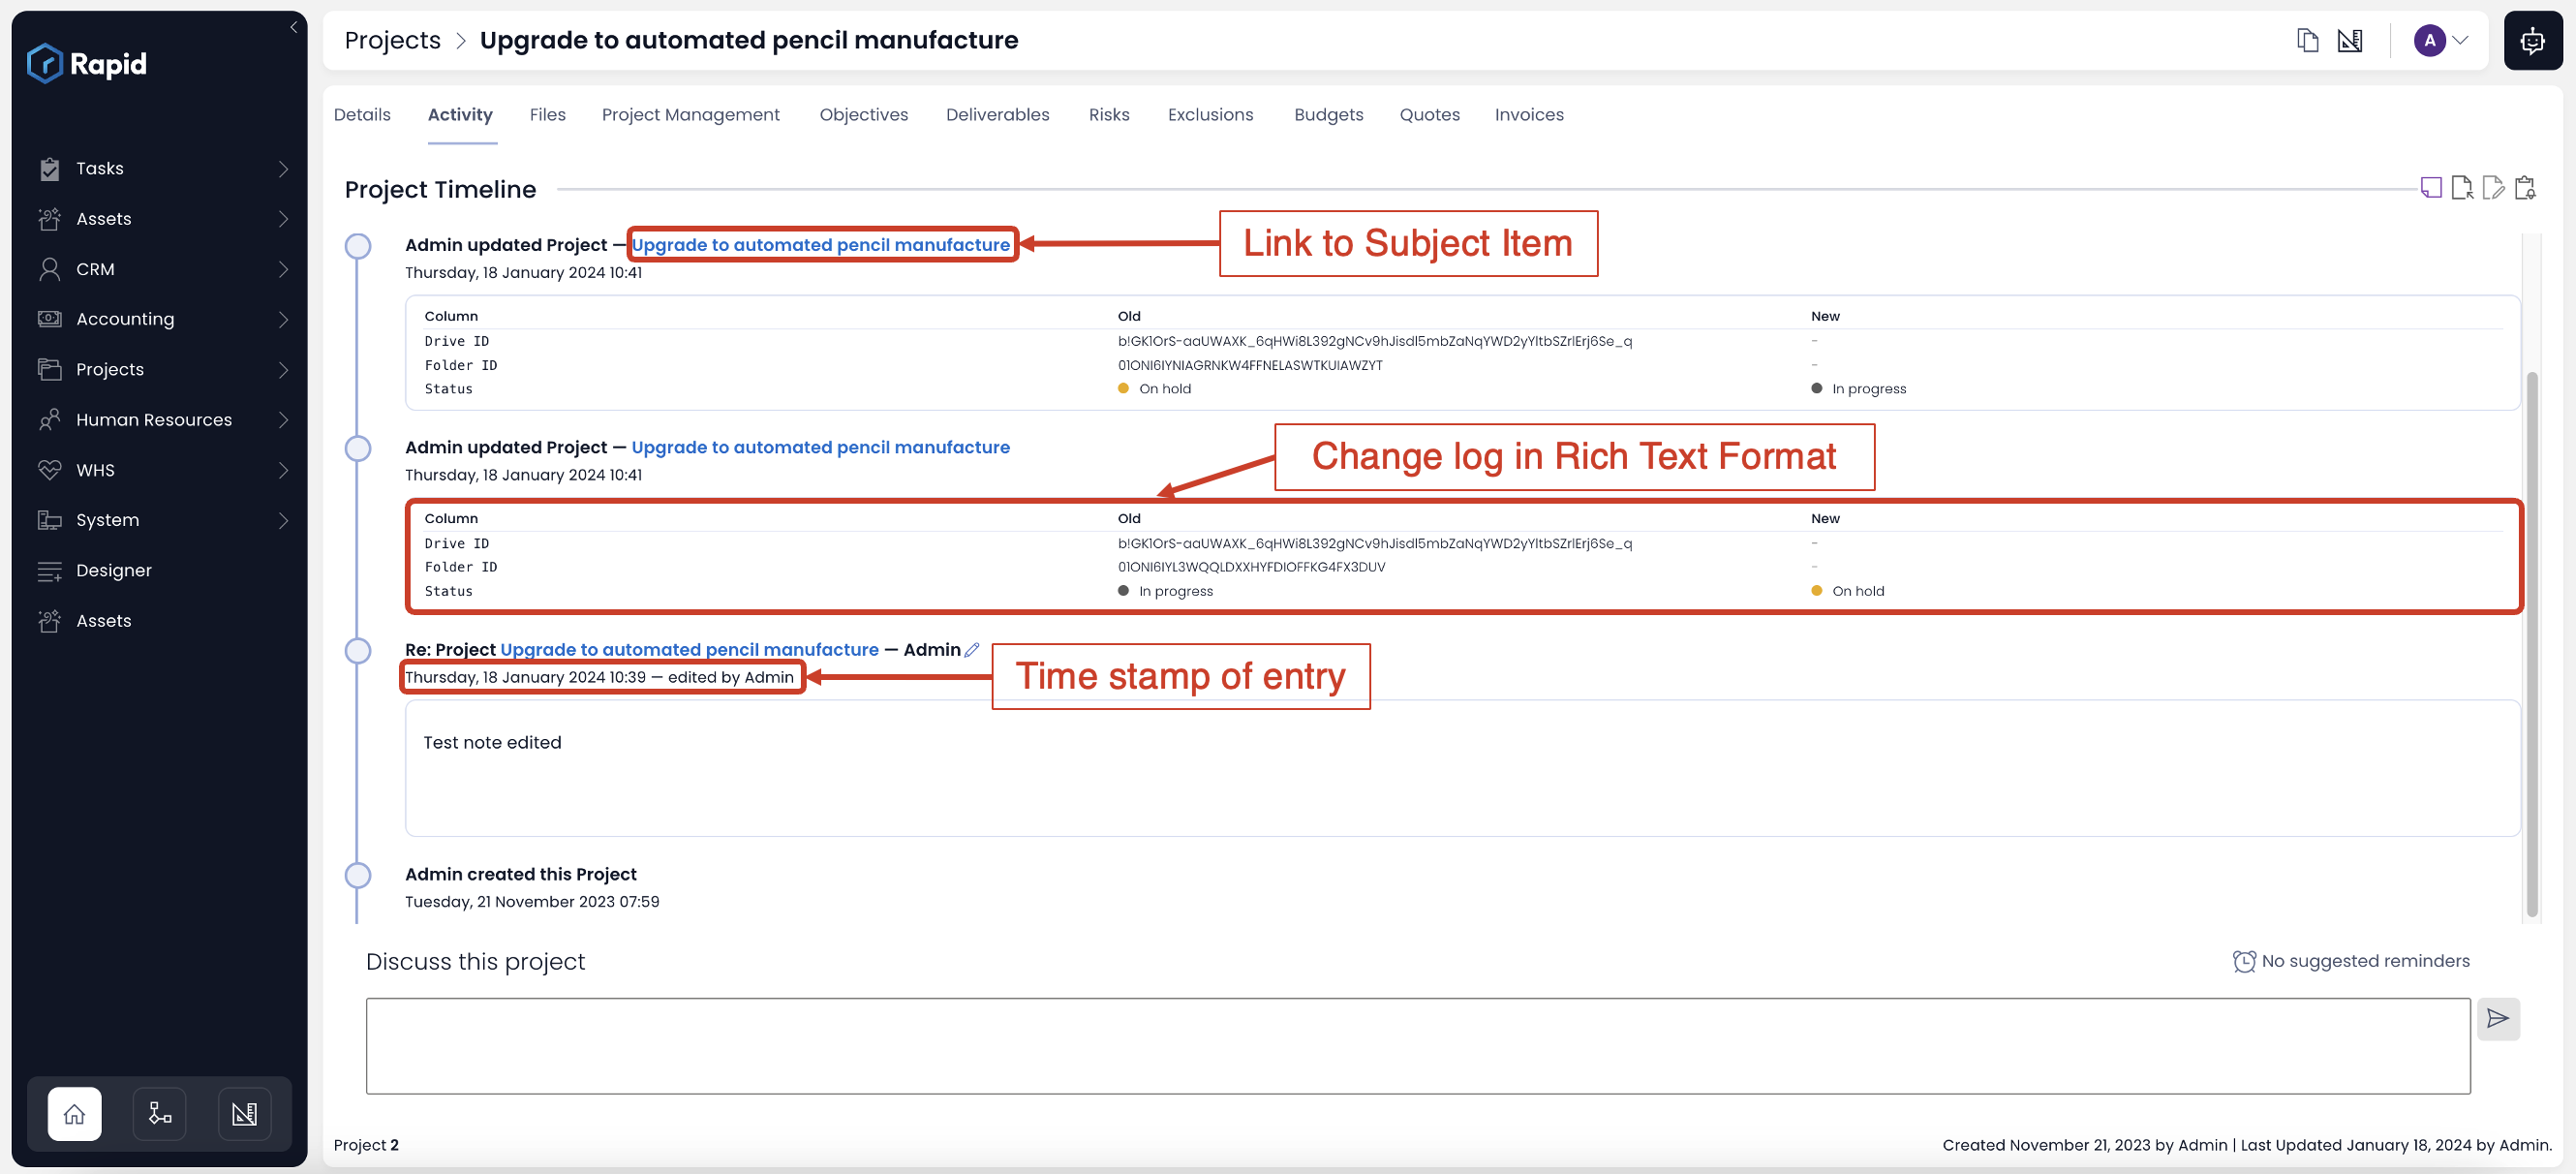
- The published note contains a link to the subject item. You can click on the link and navigate to the subject Item Details page.
- Each timeline entry displays the timestamp of its publishing. You can intuitive observe when this entry was created.
- Note that the entries are in Rich Text Format hence would retain formatting / legibility wherever possible.
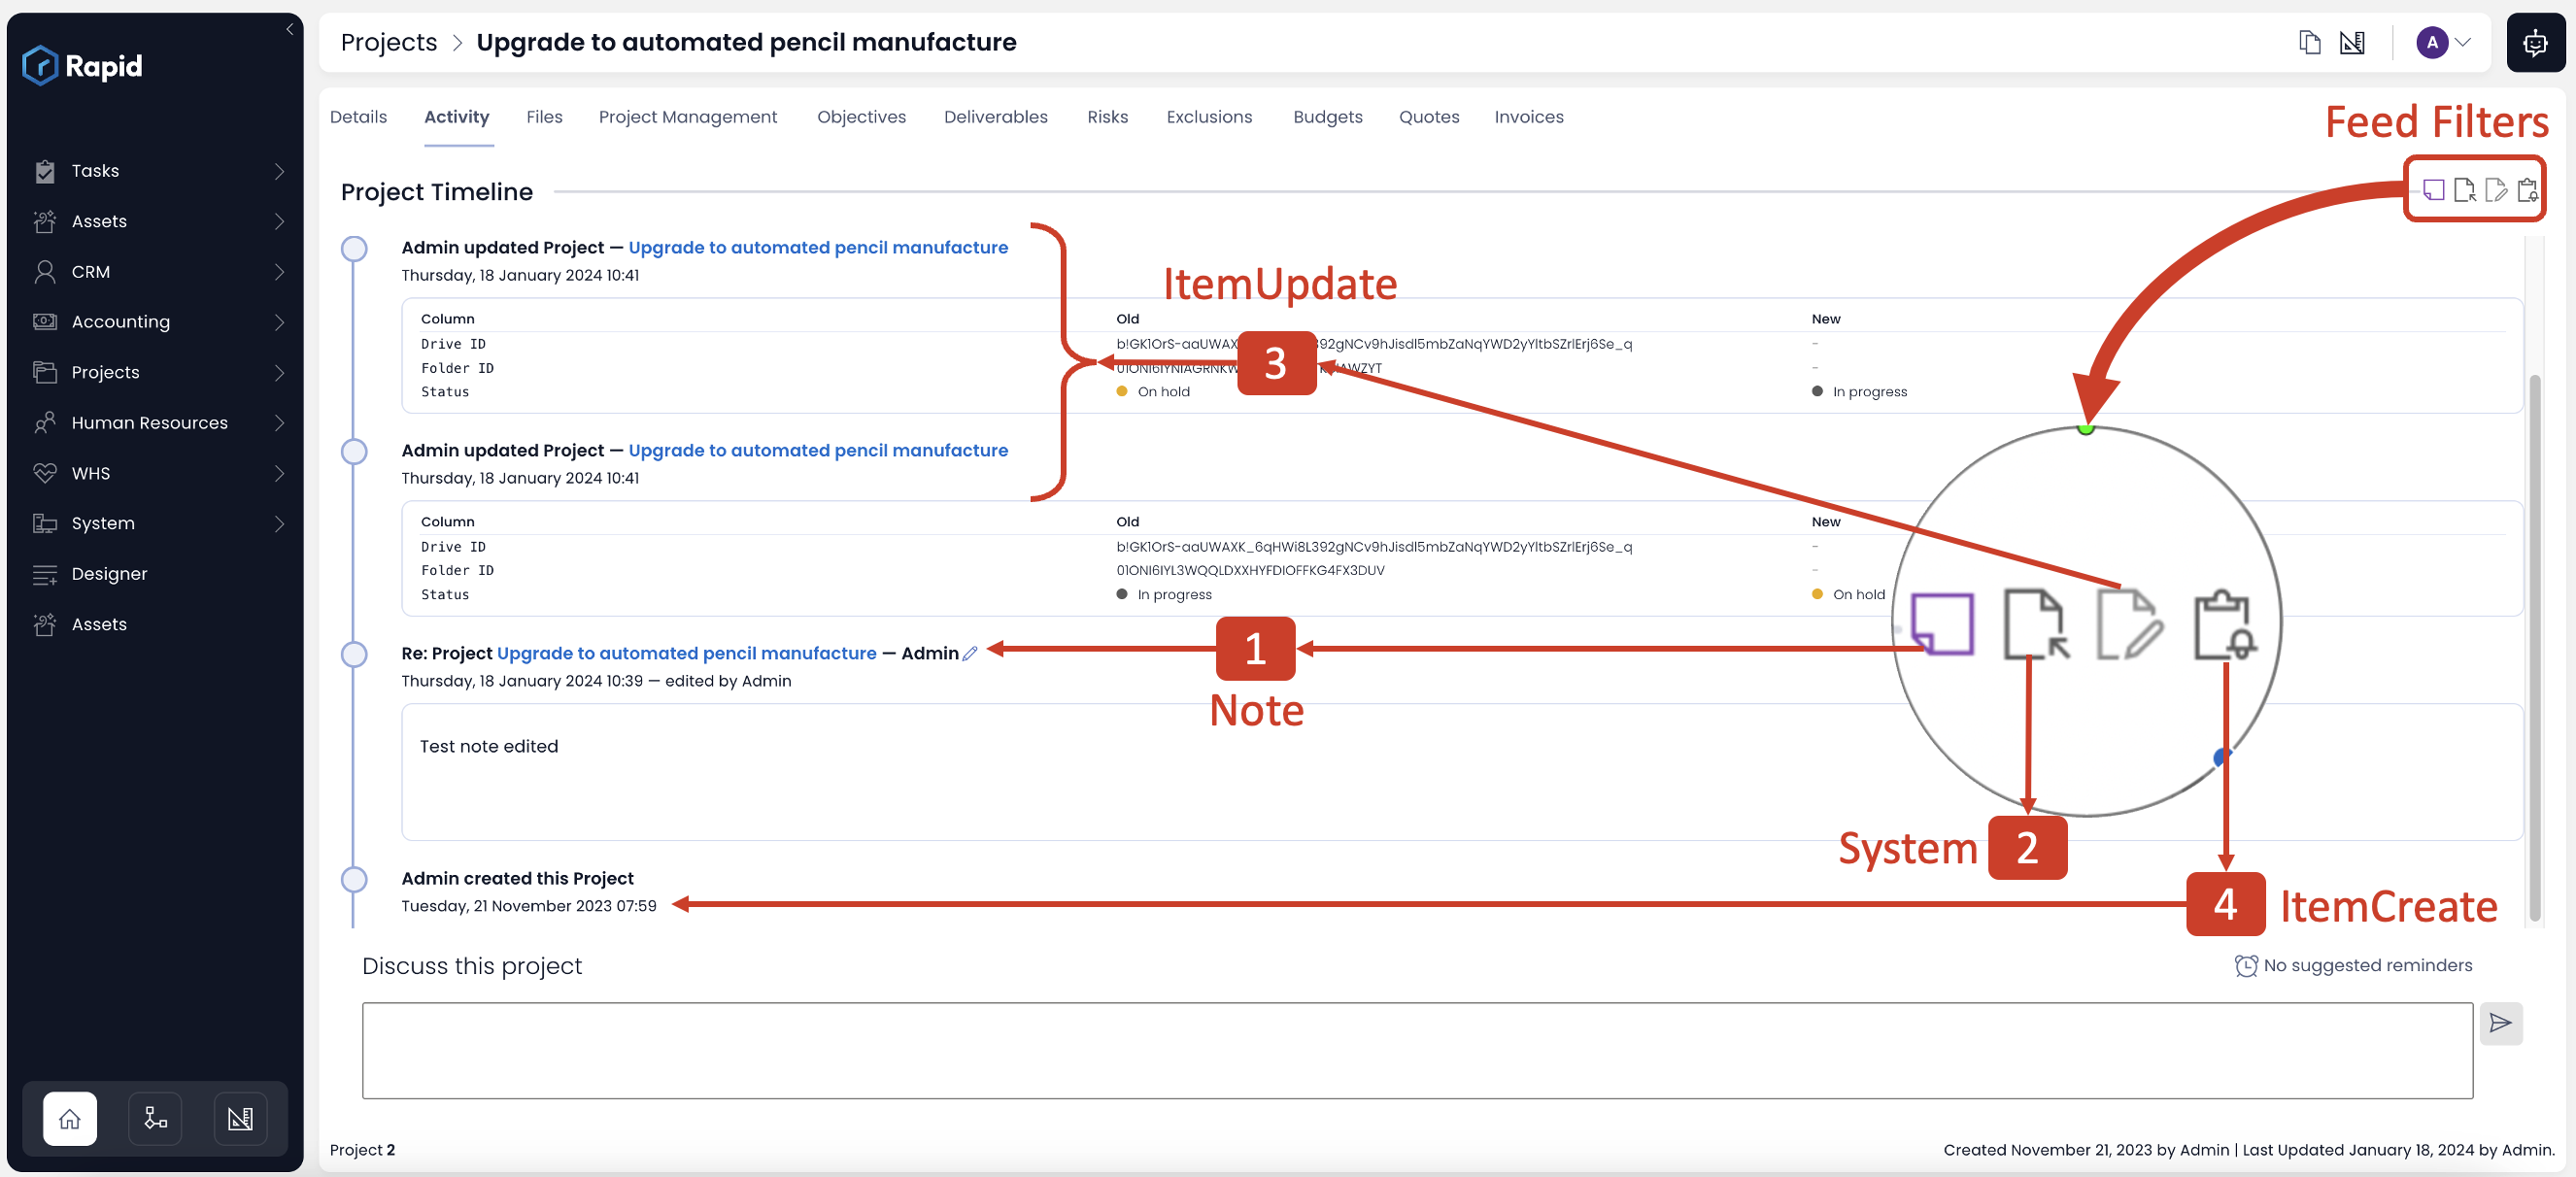
Activity Feed Filters
As a user, you have the ability to filter the Activity Feed to show specific content only. There are four different filters that can be applied to the Activity Feed. You can find these filters at the right side of the Activity Feed.
-
Hide Notes: Toggling this filter hides associated Notes that have been created for an item.
-
Hide System: Toggling this filter hides System Notes that has been created for an item.
-
Hide Item Updates: Toggling this filter hides Item Updates that have been created for an item.
-
Hide Item Created: Toggling this filter hides the Item Created note that states when an item was created.
Filtering The Activity Feed
To filter the Activity Feed:
- In the Activity Feed that you wish to filter, navigate to the top-right of the feed.
- Just click to toggle the relevant filters you wish to apply to the Activity Feed.
The Activity Feed may load with filters in default mode. If you observe that one or more of the filters are in Toggled OFF mode by default, this means they have been configured at the Activity Feed Component preferences level. You can click on the filter to manually set to ON state.
Notes in the Activity Feed
Imagine you are the lead manager managing a pipeline of 50 leads. Details of each of these 50 leads is entered as an item in the Leads Table. Now you wish to record certain "Notes" against specific lead items. These Notes can be referred by other stakeholders.
This is possible via the Activity Feed's Notes feature.
Users have the ability to view all the notes previously added to the item.
Users can also add their own notes against items. To add notes to an activity feed:
- In the activity feed of the item you wish to add a note to, enter your desired note in the text box located at the bottom of the page.
- Click the Submit Note button at the edge of the text box to save your note to the item.
You can also press Ctrl + Enter to Submit the note.
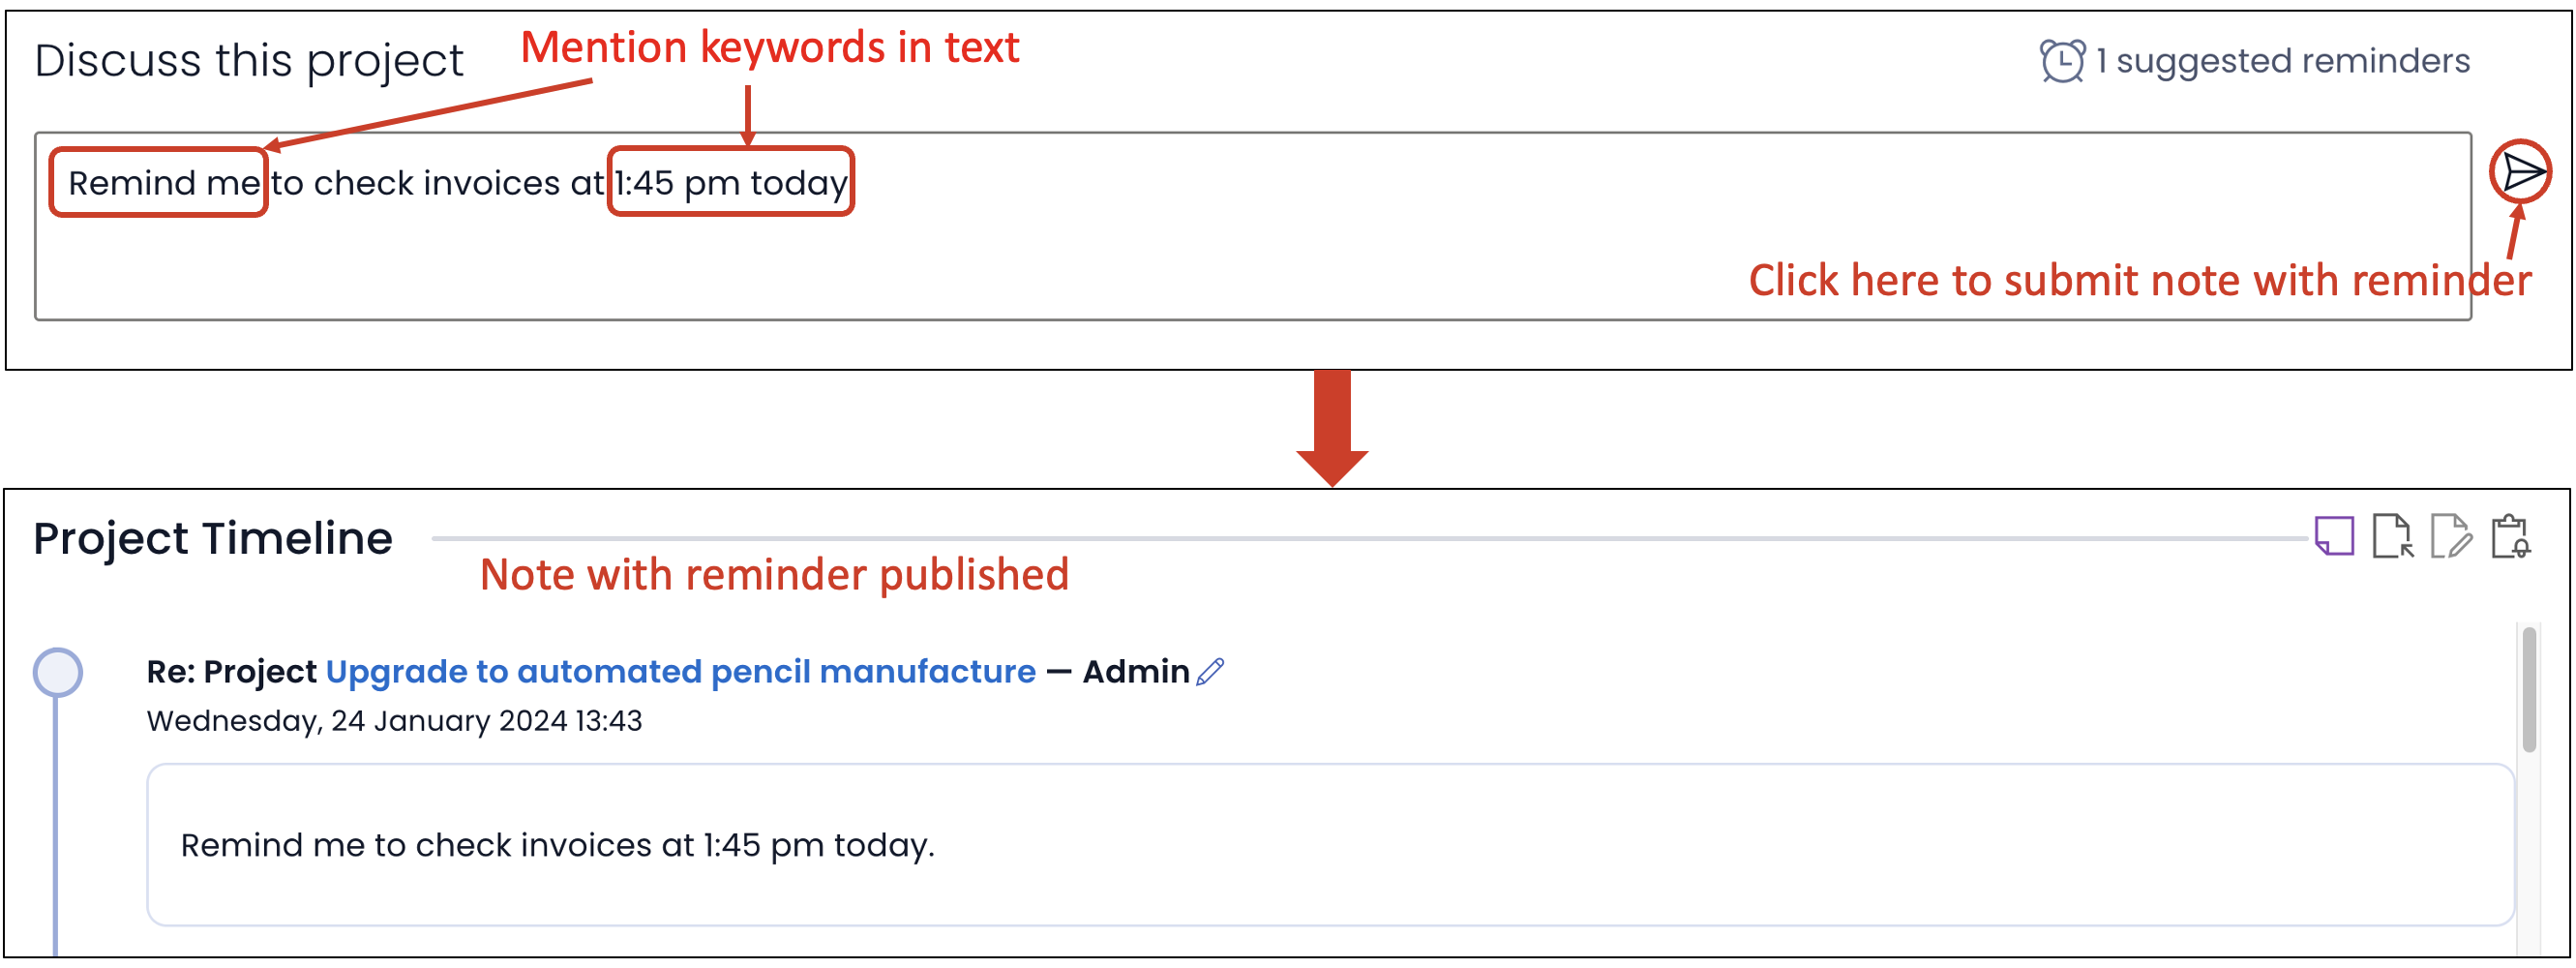
The published note will appear on the timeline of the Activity Feed.

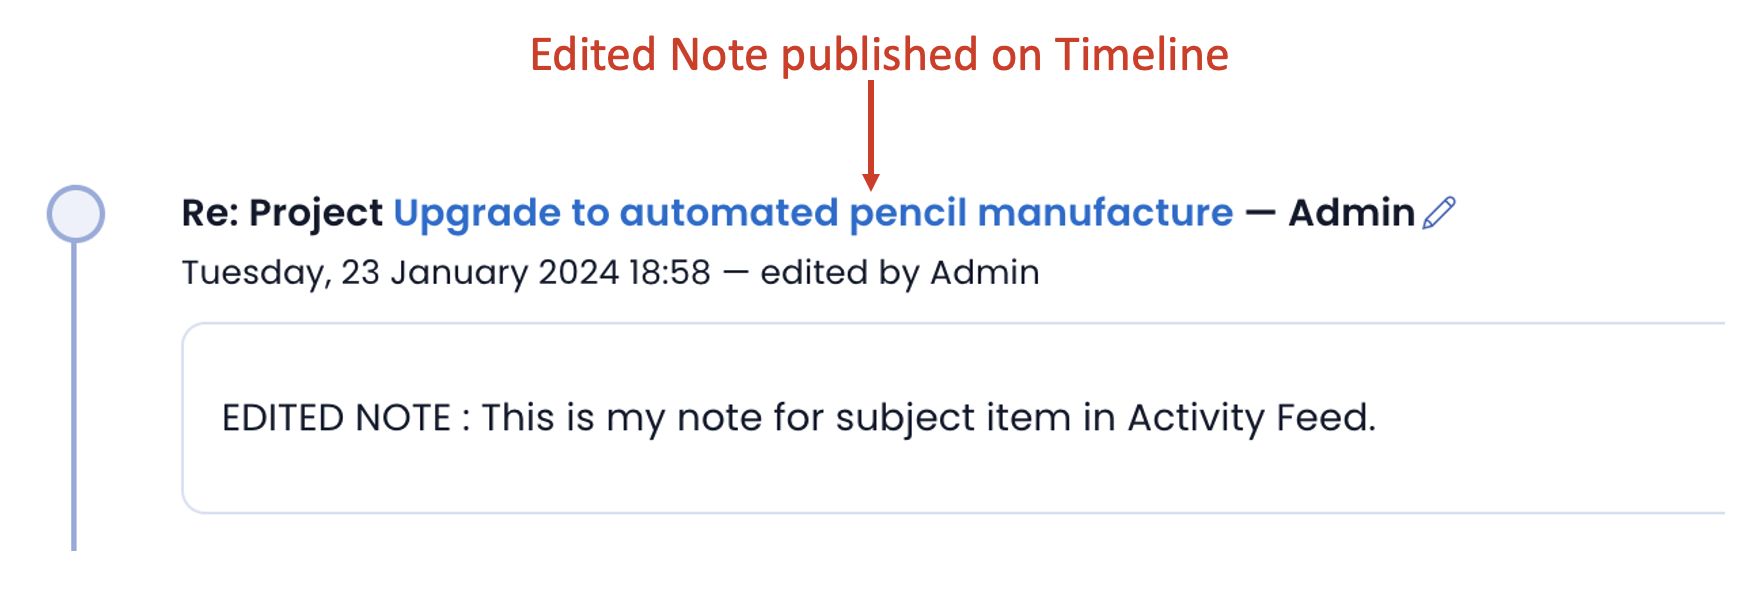
Editing Notes
Users can also edit notes that have been created. To edit notes:
-
Navigate to the Activity Feed of the note that you wish to edit.
-
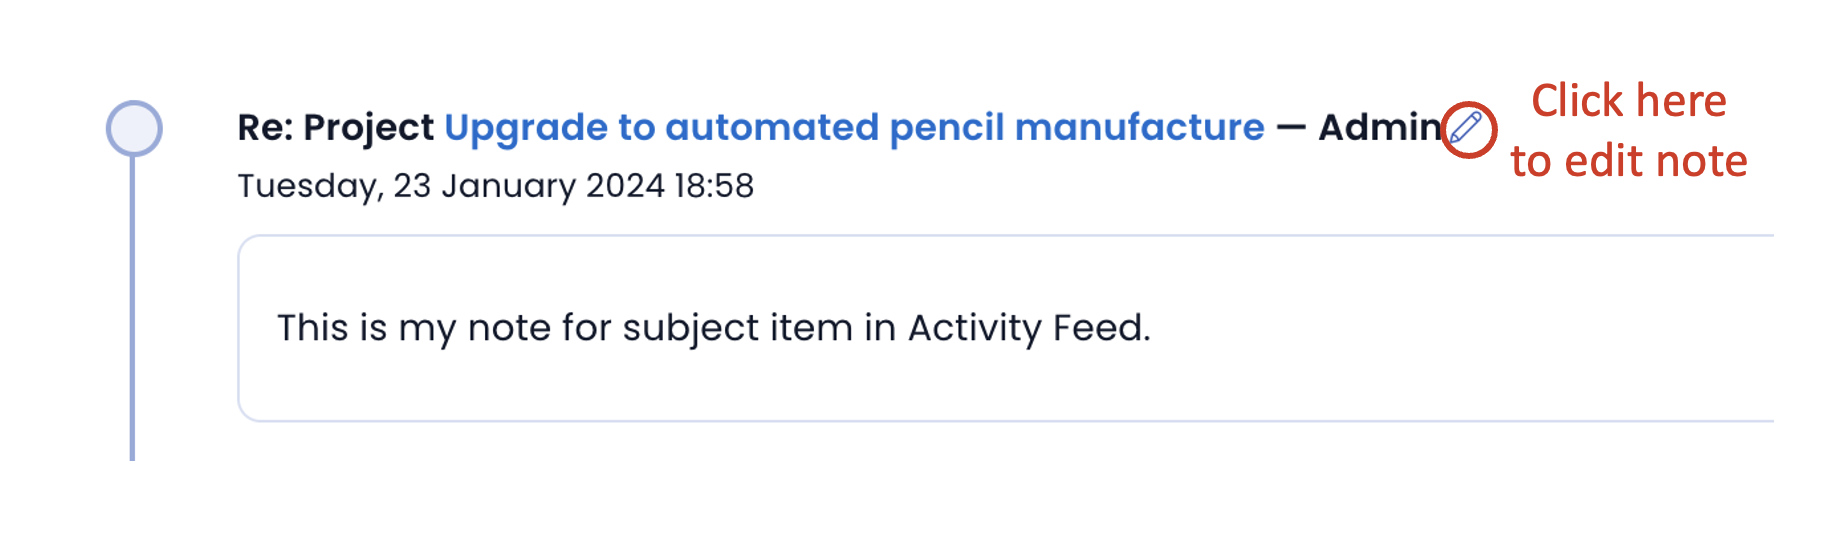
At the note you wish to edit, click edit.
-
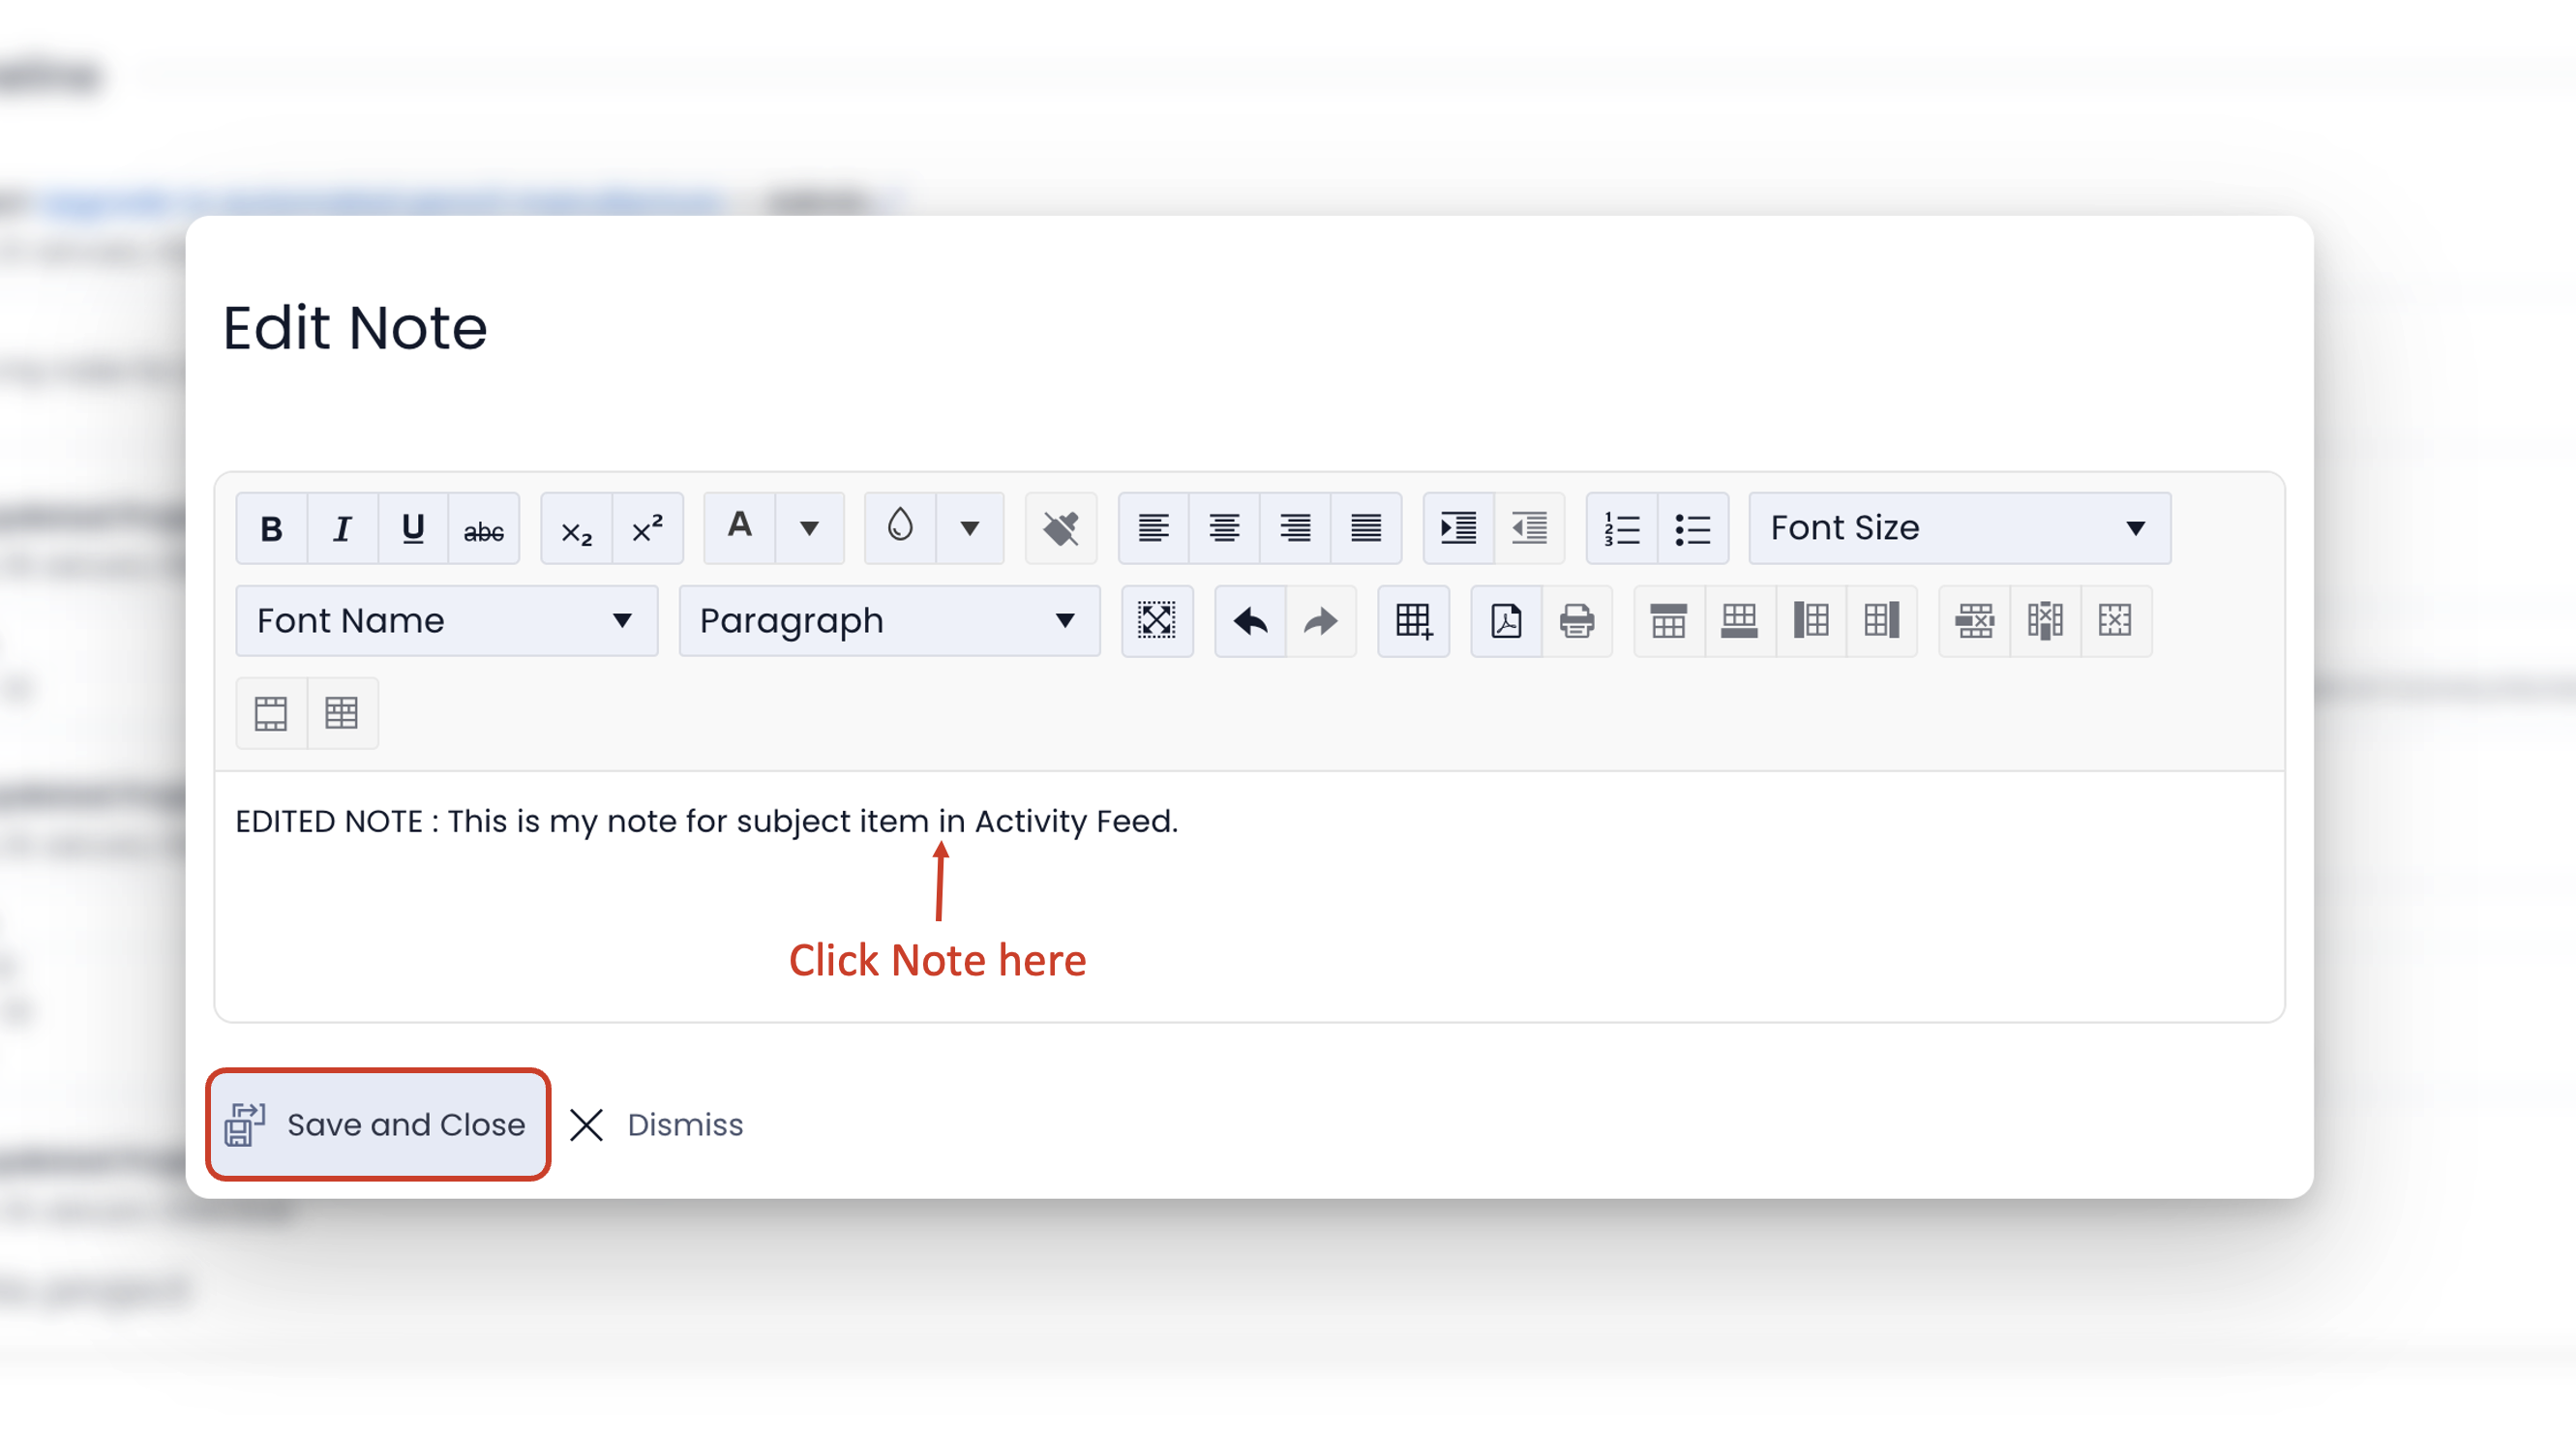
You may now alter the note in the Edit Note popup window.
-
Click Save and Close to save the changes that have been made and close the window. Your note has now been updated.
Suggested Reminders
Suggested Reminders allows users to set reminders for themselves either using the automated reminder system or by manually assigning a reminder date.
Automatically Generated Reminders (smart reminders)
Automatically generated reminders utilize specific phrases to identify reminders. To set an automatically generated reminders:
- In the text box, begin the sentence with phrases such as Remind me..., Chase up..., Check on..., along with the rest of the reminder followed with a date and time, e.g. Remind me to check invoices today at 6:00PM.
- Click the Submit button at the edge of the text box to save your reminder note to the item.
Click here to learn more about Smart Reminders
Manually Generated Reminders
To manually generate reminders:
- In the Activity Feed of the item you wish to manually generate a reminder, click the Suggested Reminders button above the text box.
- Click Add Reminder.
- Enter a phrase as well as a date and time.
- Click the close icon "X" at the top right corner to exit.
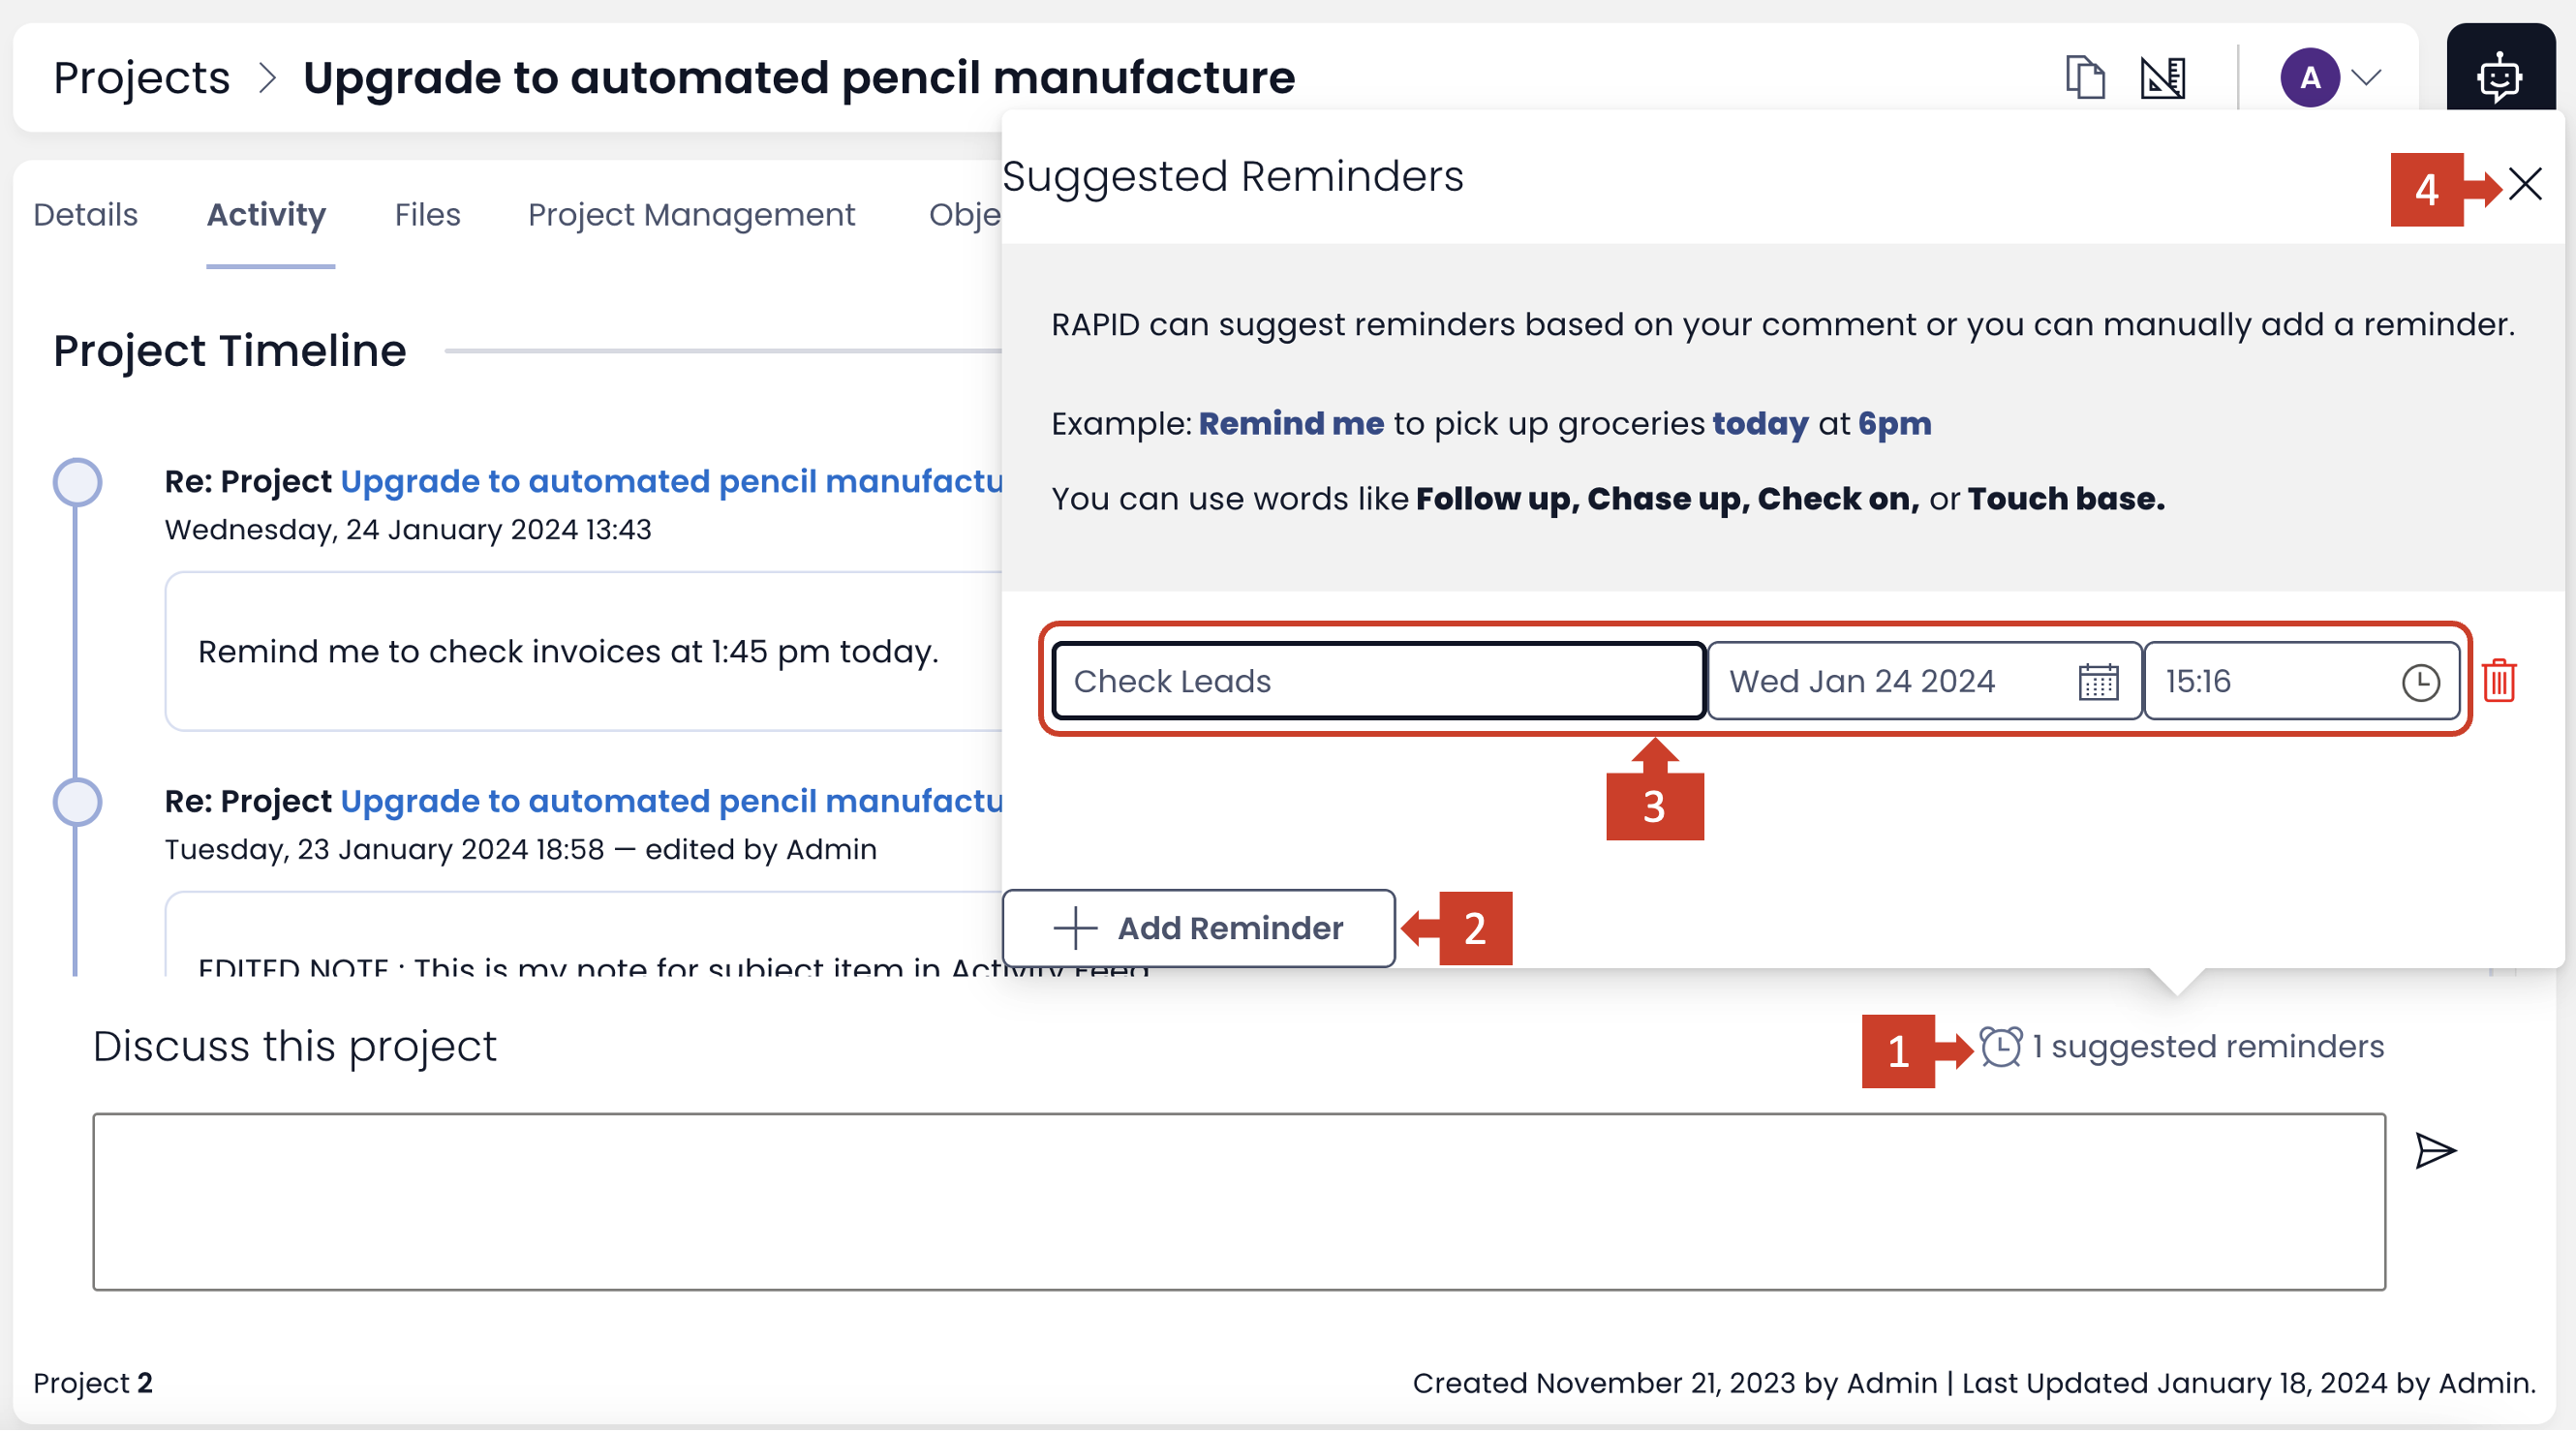
You may add more than one reminder, to add another click Add Reminder again.
Once all the reminders have been set, you need to add a note.
Click the Submit button at the edge of the text box to save your reminder note to the item.
If the note is not created, then the manual reminder does not take effect.
Removing a reminder
You can easily remove a reminder by clicking on the bin icon. This will delete the reminder.
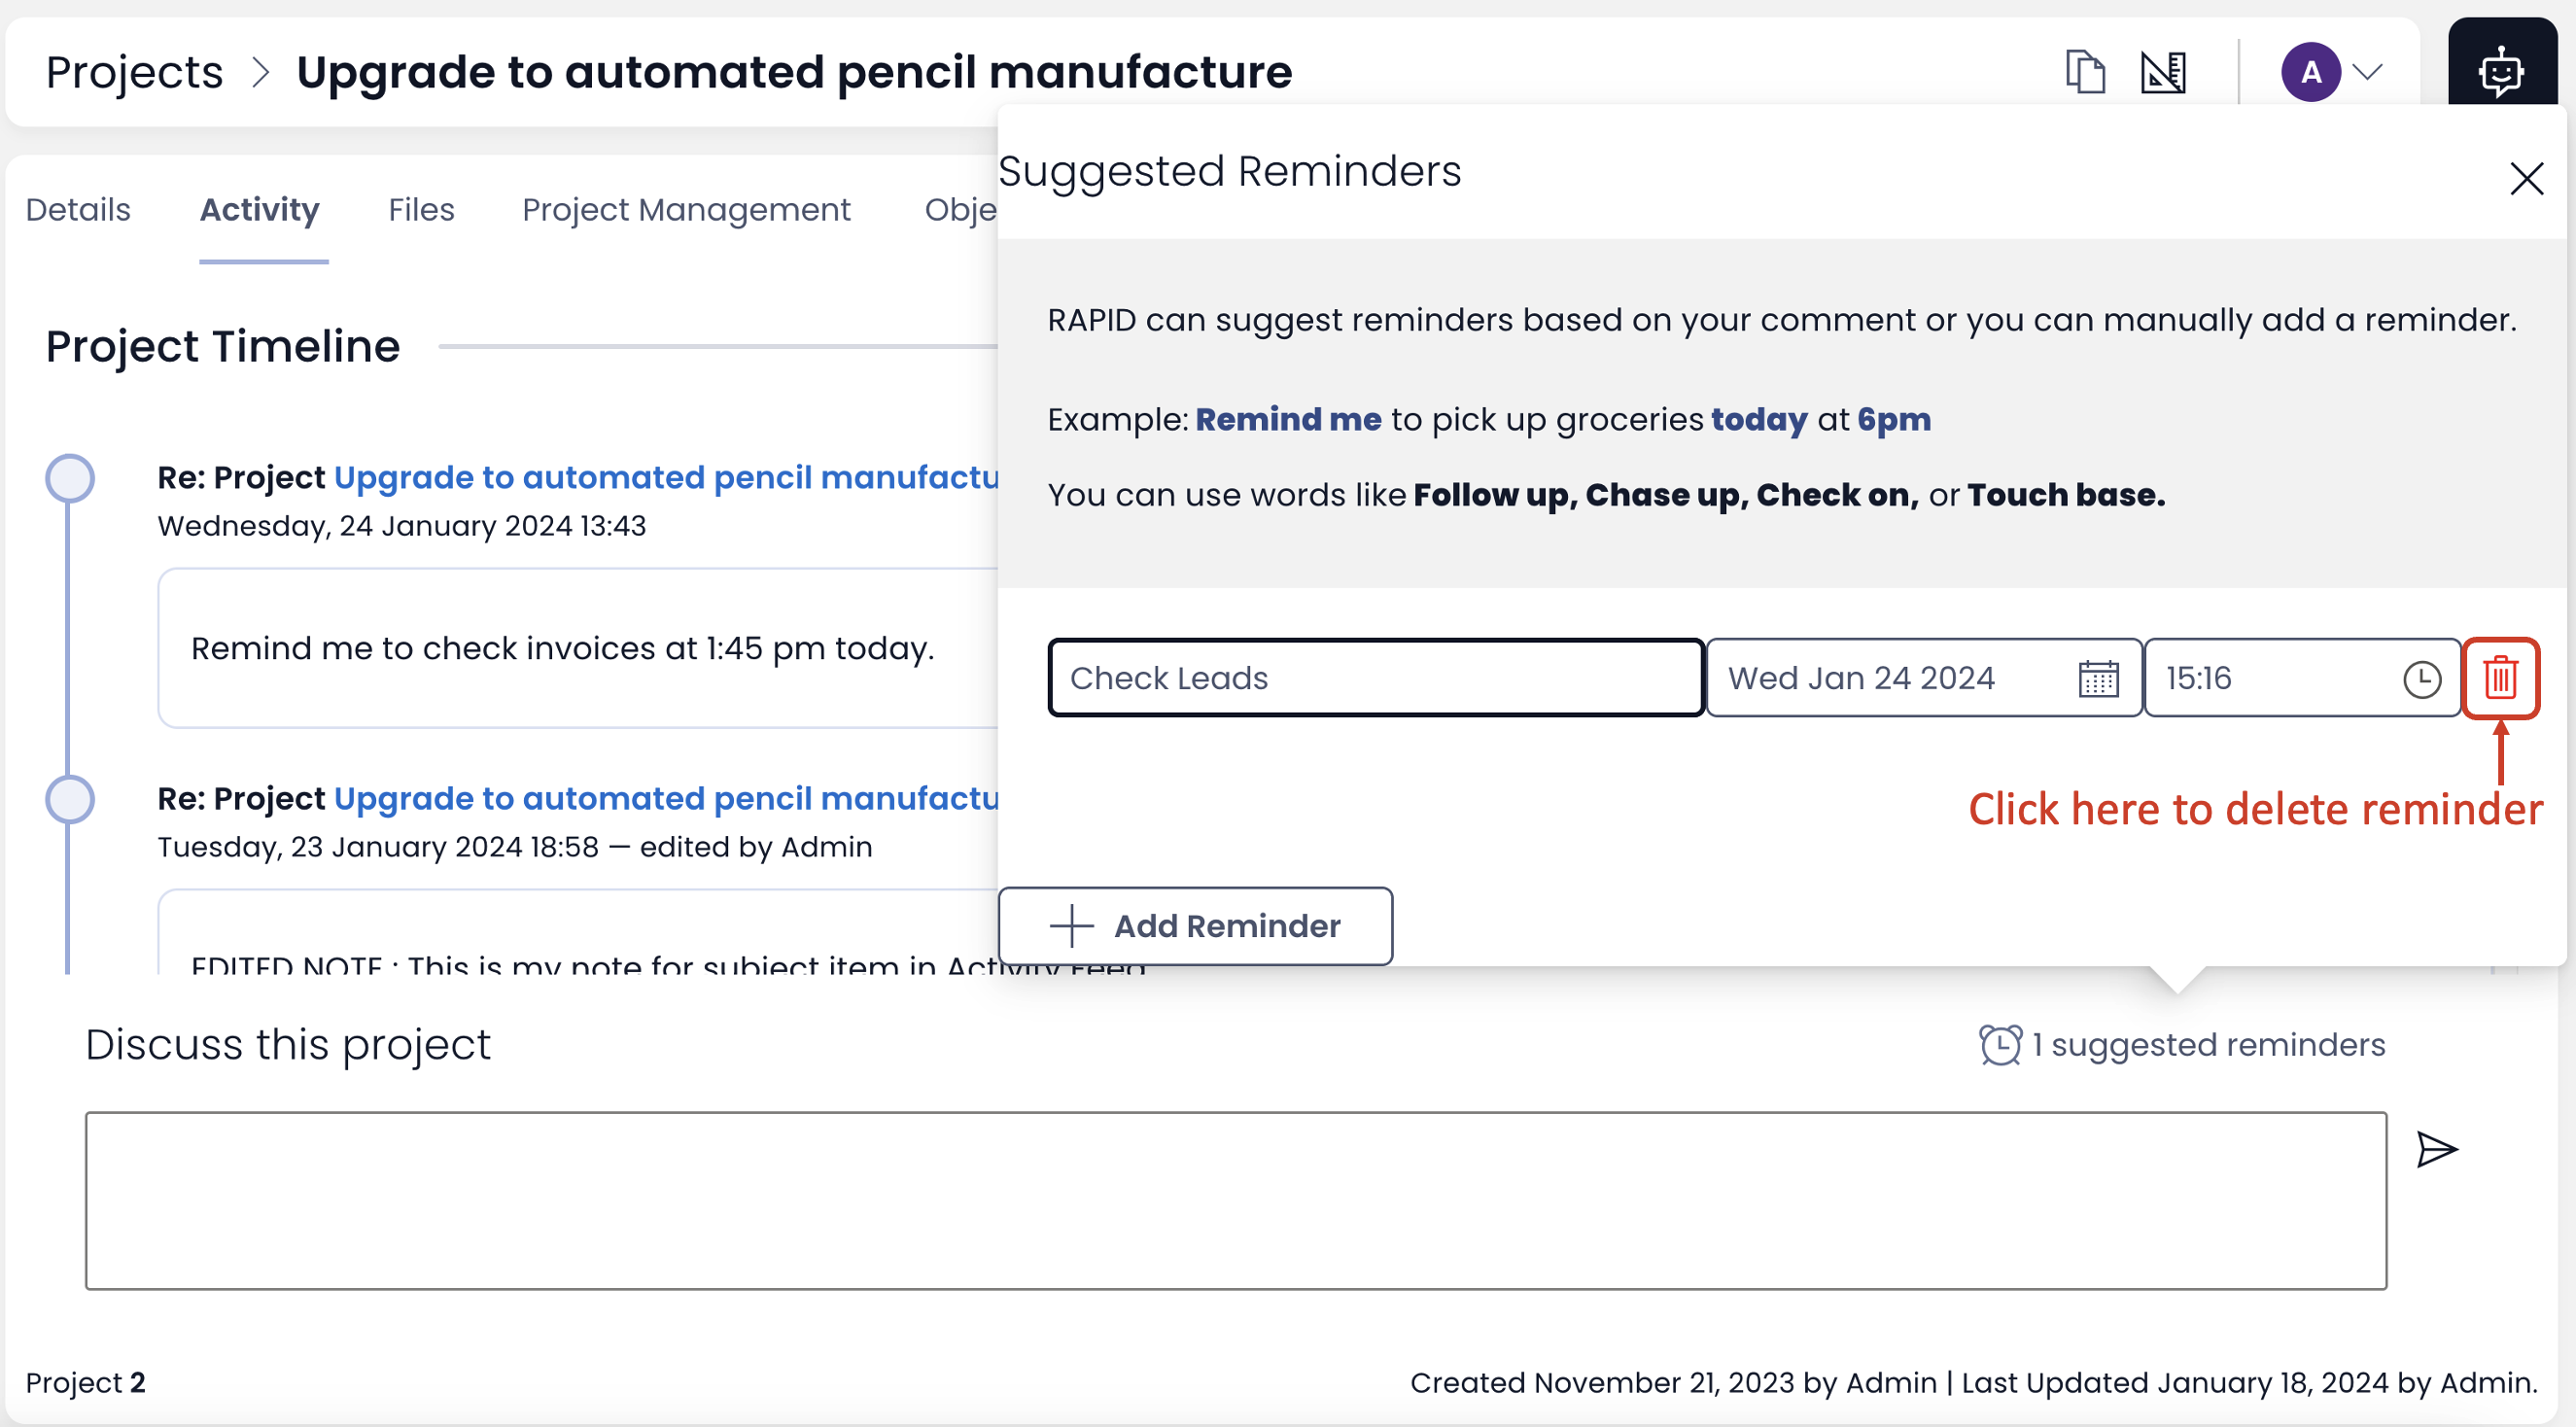
Please note you can delete a reminder only till the moment you have not published the reminder note. Once the note is published, the reminder is set in the system and can only be dismissed using the action buttons in Notifications. (discussed below)
Viewing reminders
The reminders can be viewed in the Notifications section for your user. You can click on your user profile icon at the top right corner of your Rapid Site.
The list of all notifications will appear here.
If the notification is for the reminder, you will receive action buttons to snooze and dismiss reminder.
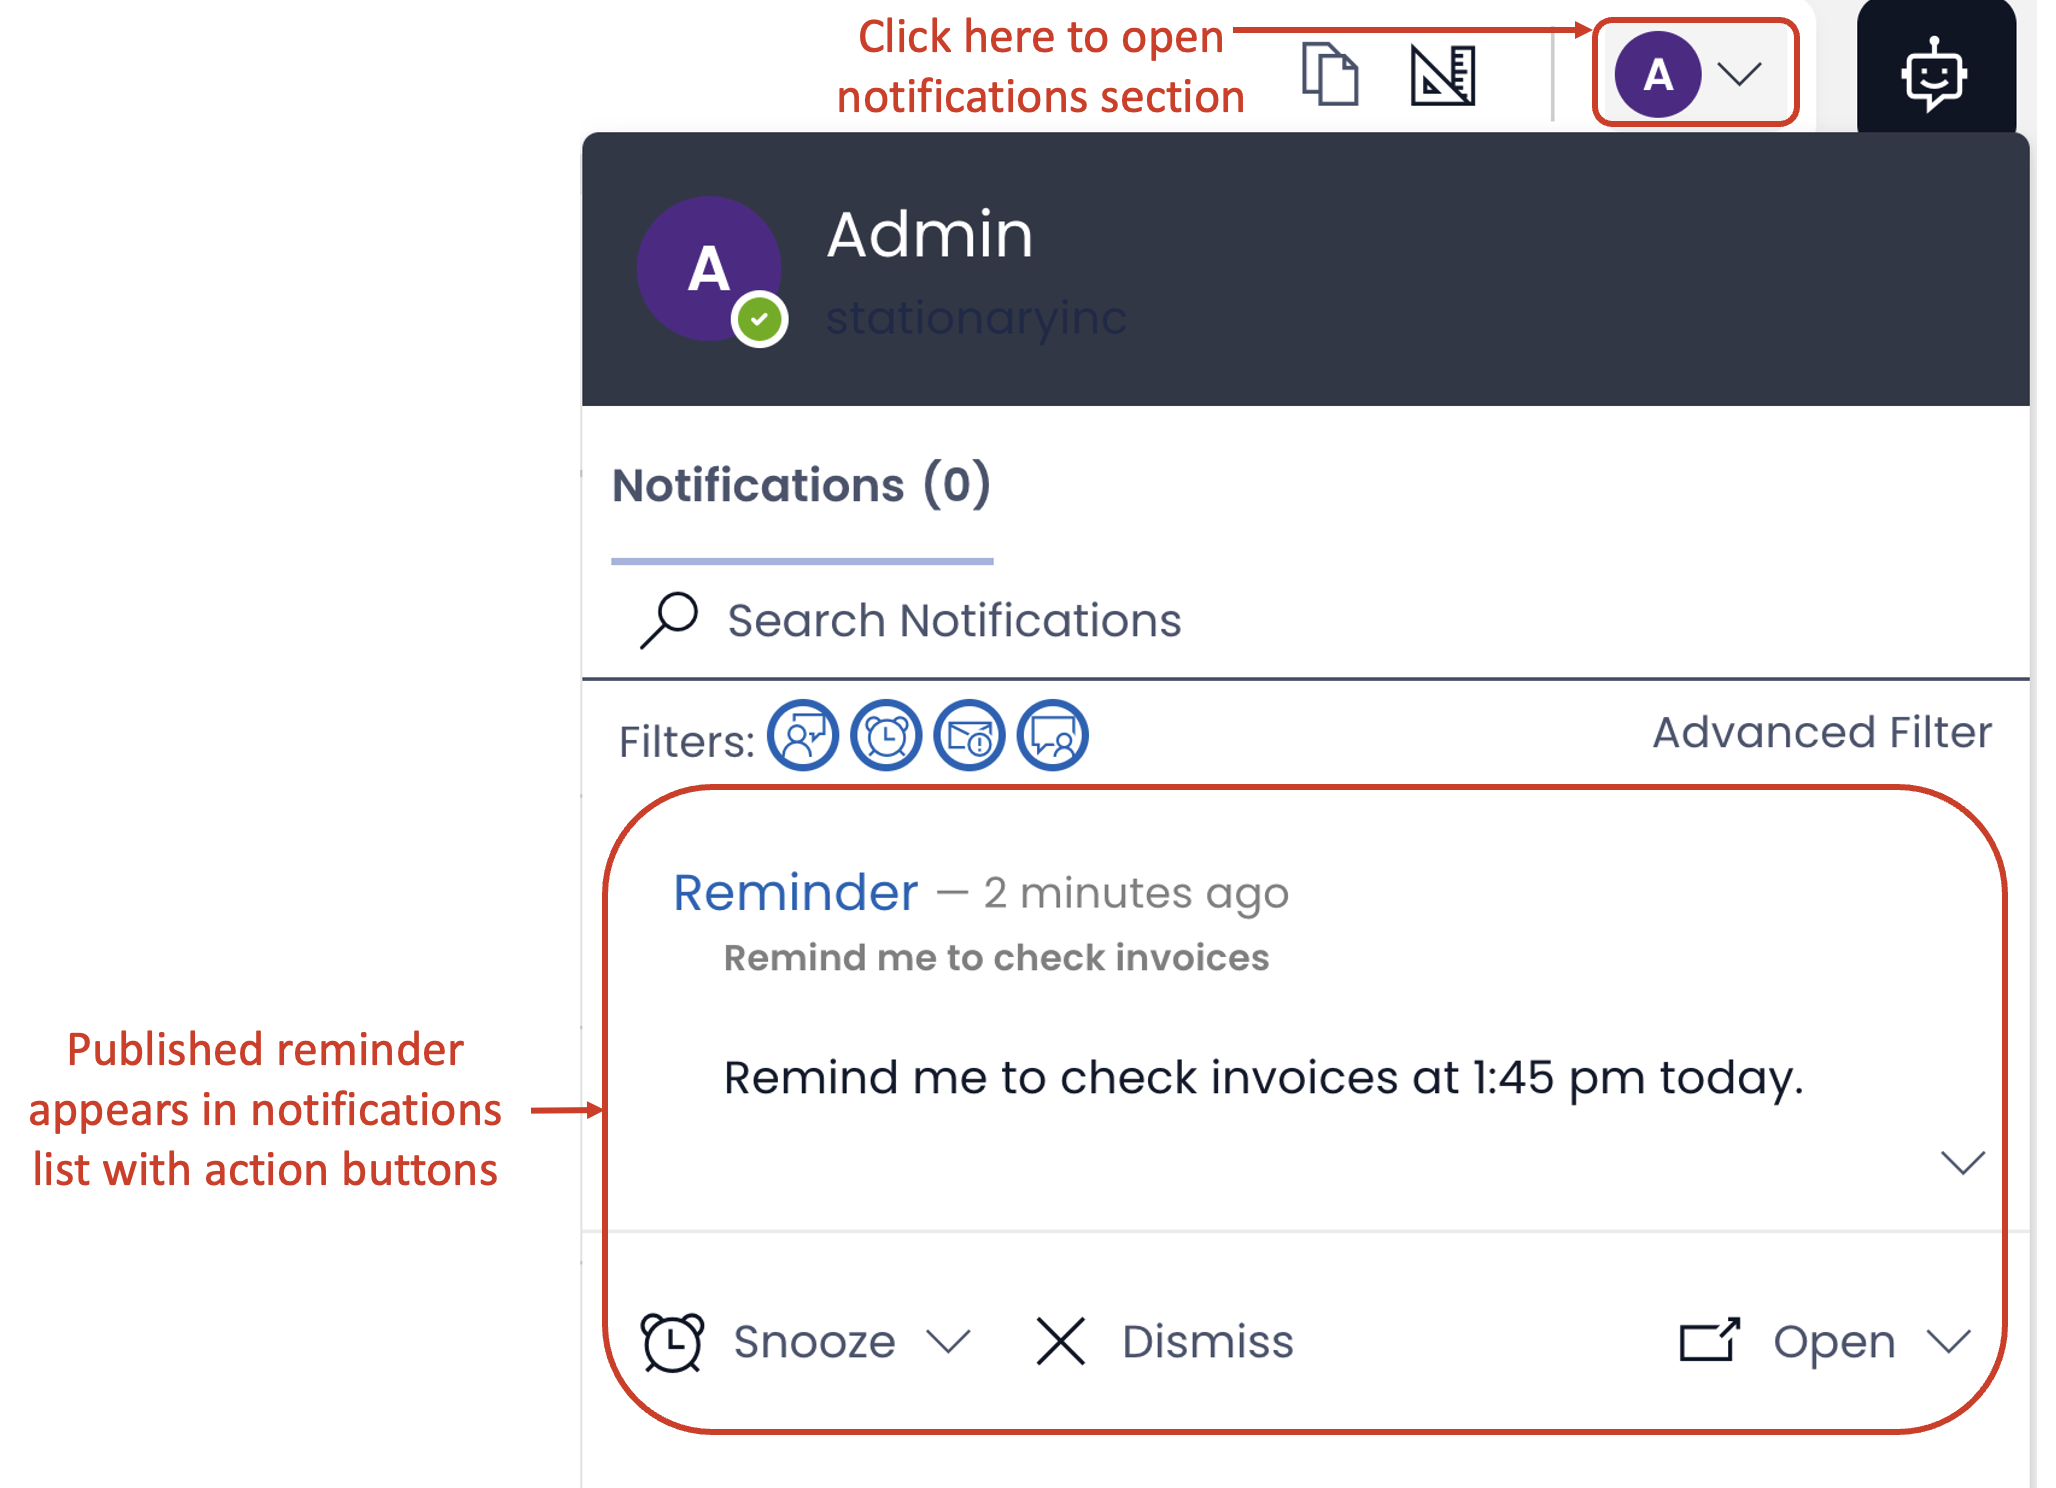
To know more about notifications - click here
Actions buttons for reminders in Notifications
-
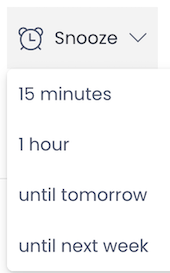
Snooze - as the name suggests, this will snooze the notification for a defined time interval. Clicking on the Snooze dropdown you will get four options to choose from (as shown in image)
-
Dismiss - This action will close the reminder and remove it from notifications list.

-
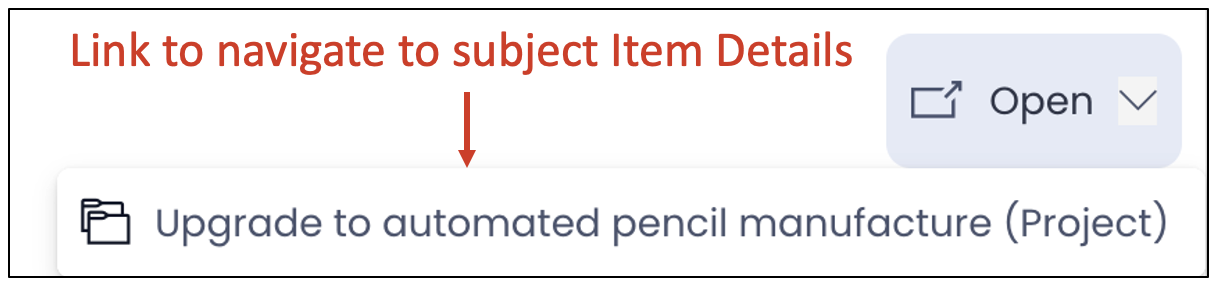
Open - Clicking on this button will give you the link to navigate to the subject Item Details page.
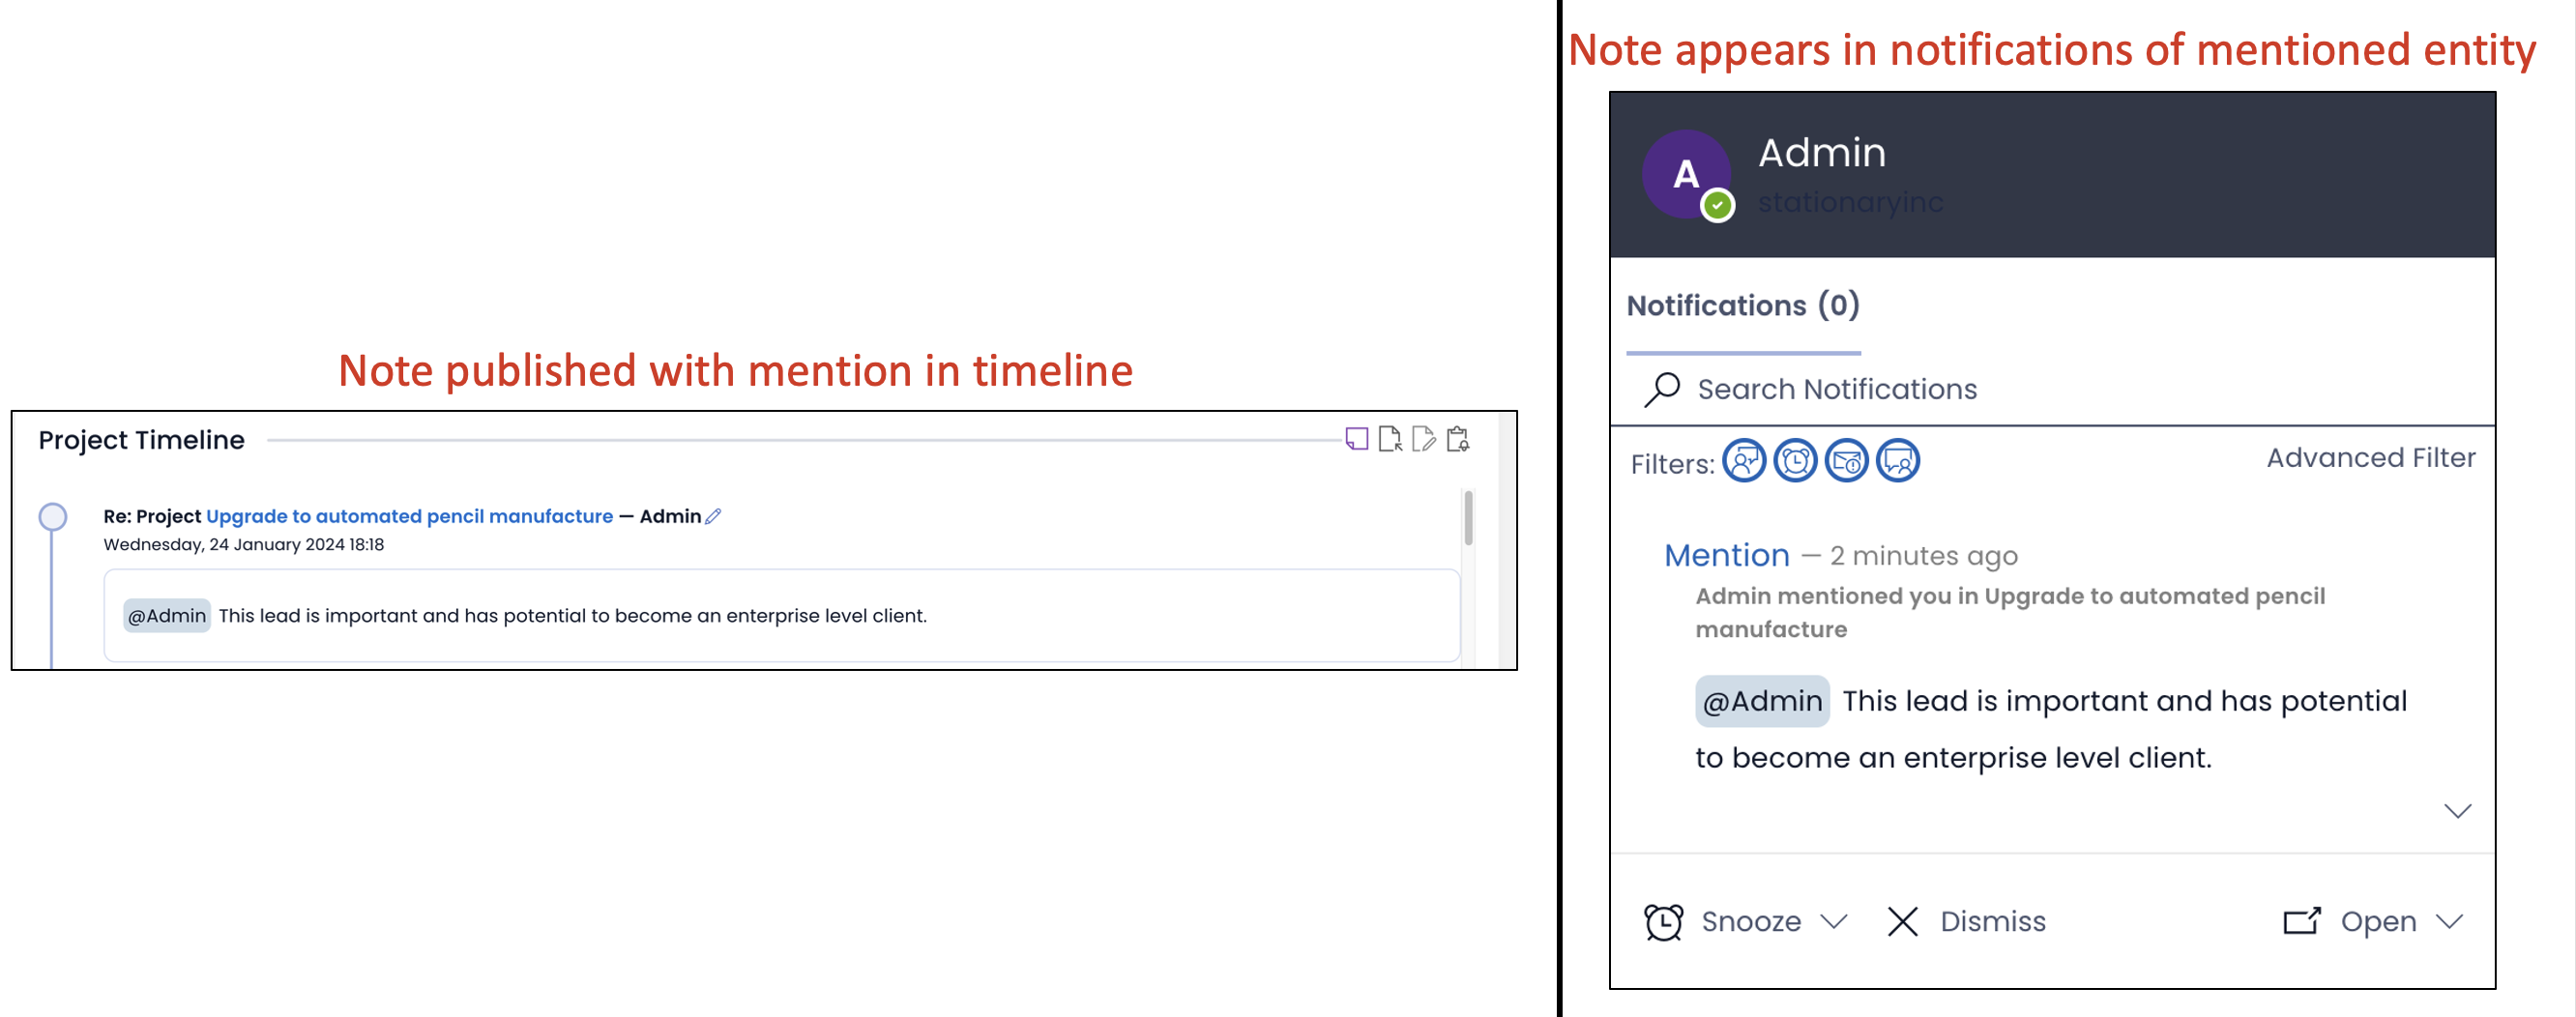
Notes with mentions
Imagine you wish a public note to be addressed for a specific person. For example - a lead requires special attention as it can be a potential enterprise client. You want this to be noticed by your Sales Manager. Therefore, you can publish a note with a mention to your Sales Manager.
To create a note with mention:
- Write "@"
- This will open the list containing all the eligible system users and groups. Select your desired entity.
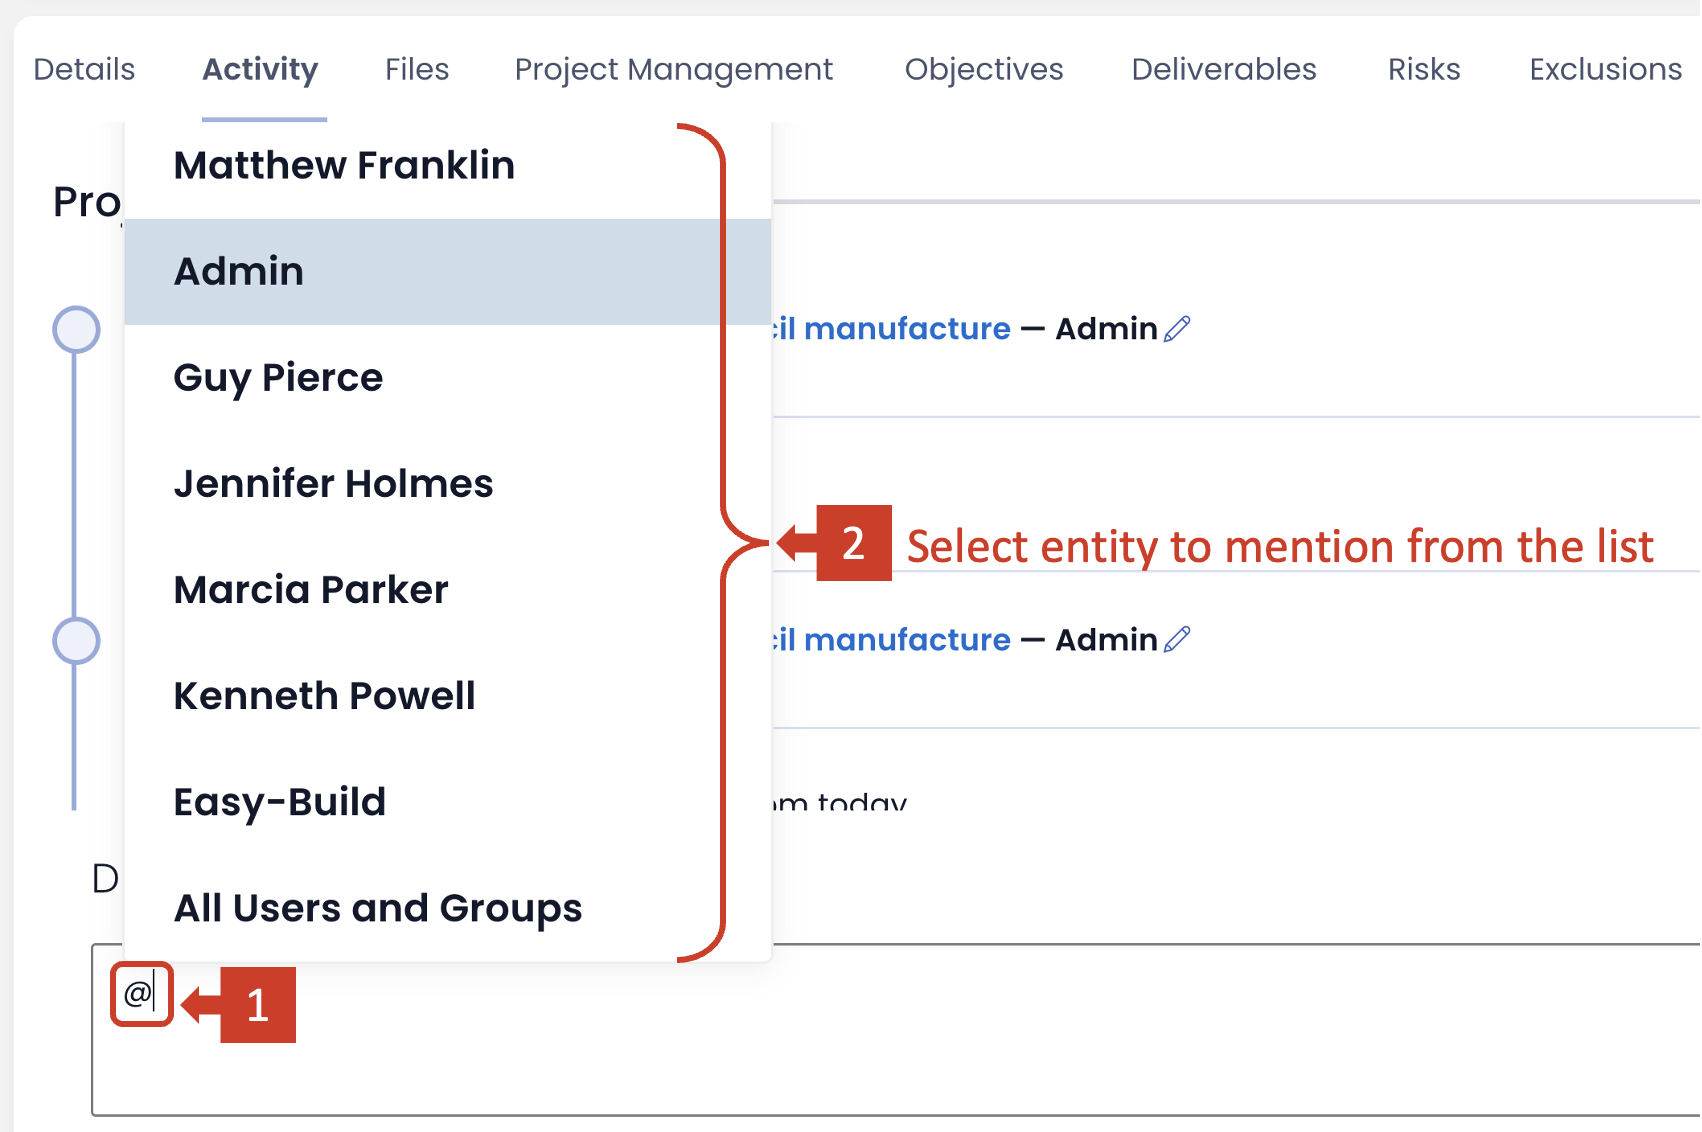
- Complete your note and press Submit.

The note can be seen in the timeline as well as will be received in the notifications section of the mentioned entity.